From a contact page when a property has already been added:
Step 1:
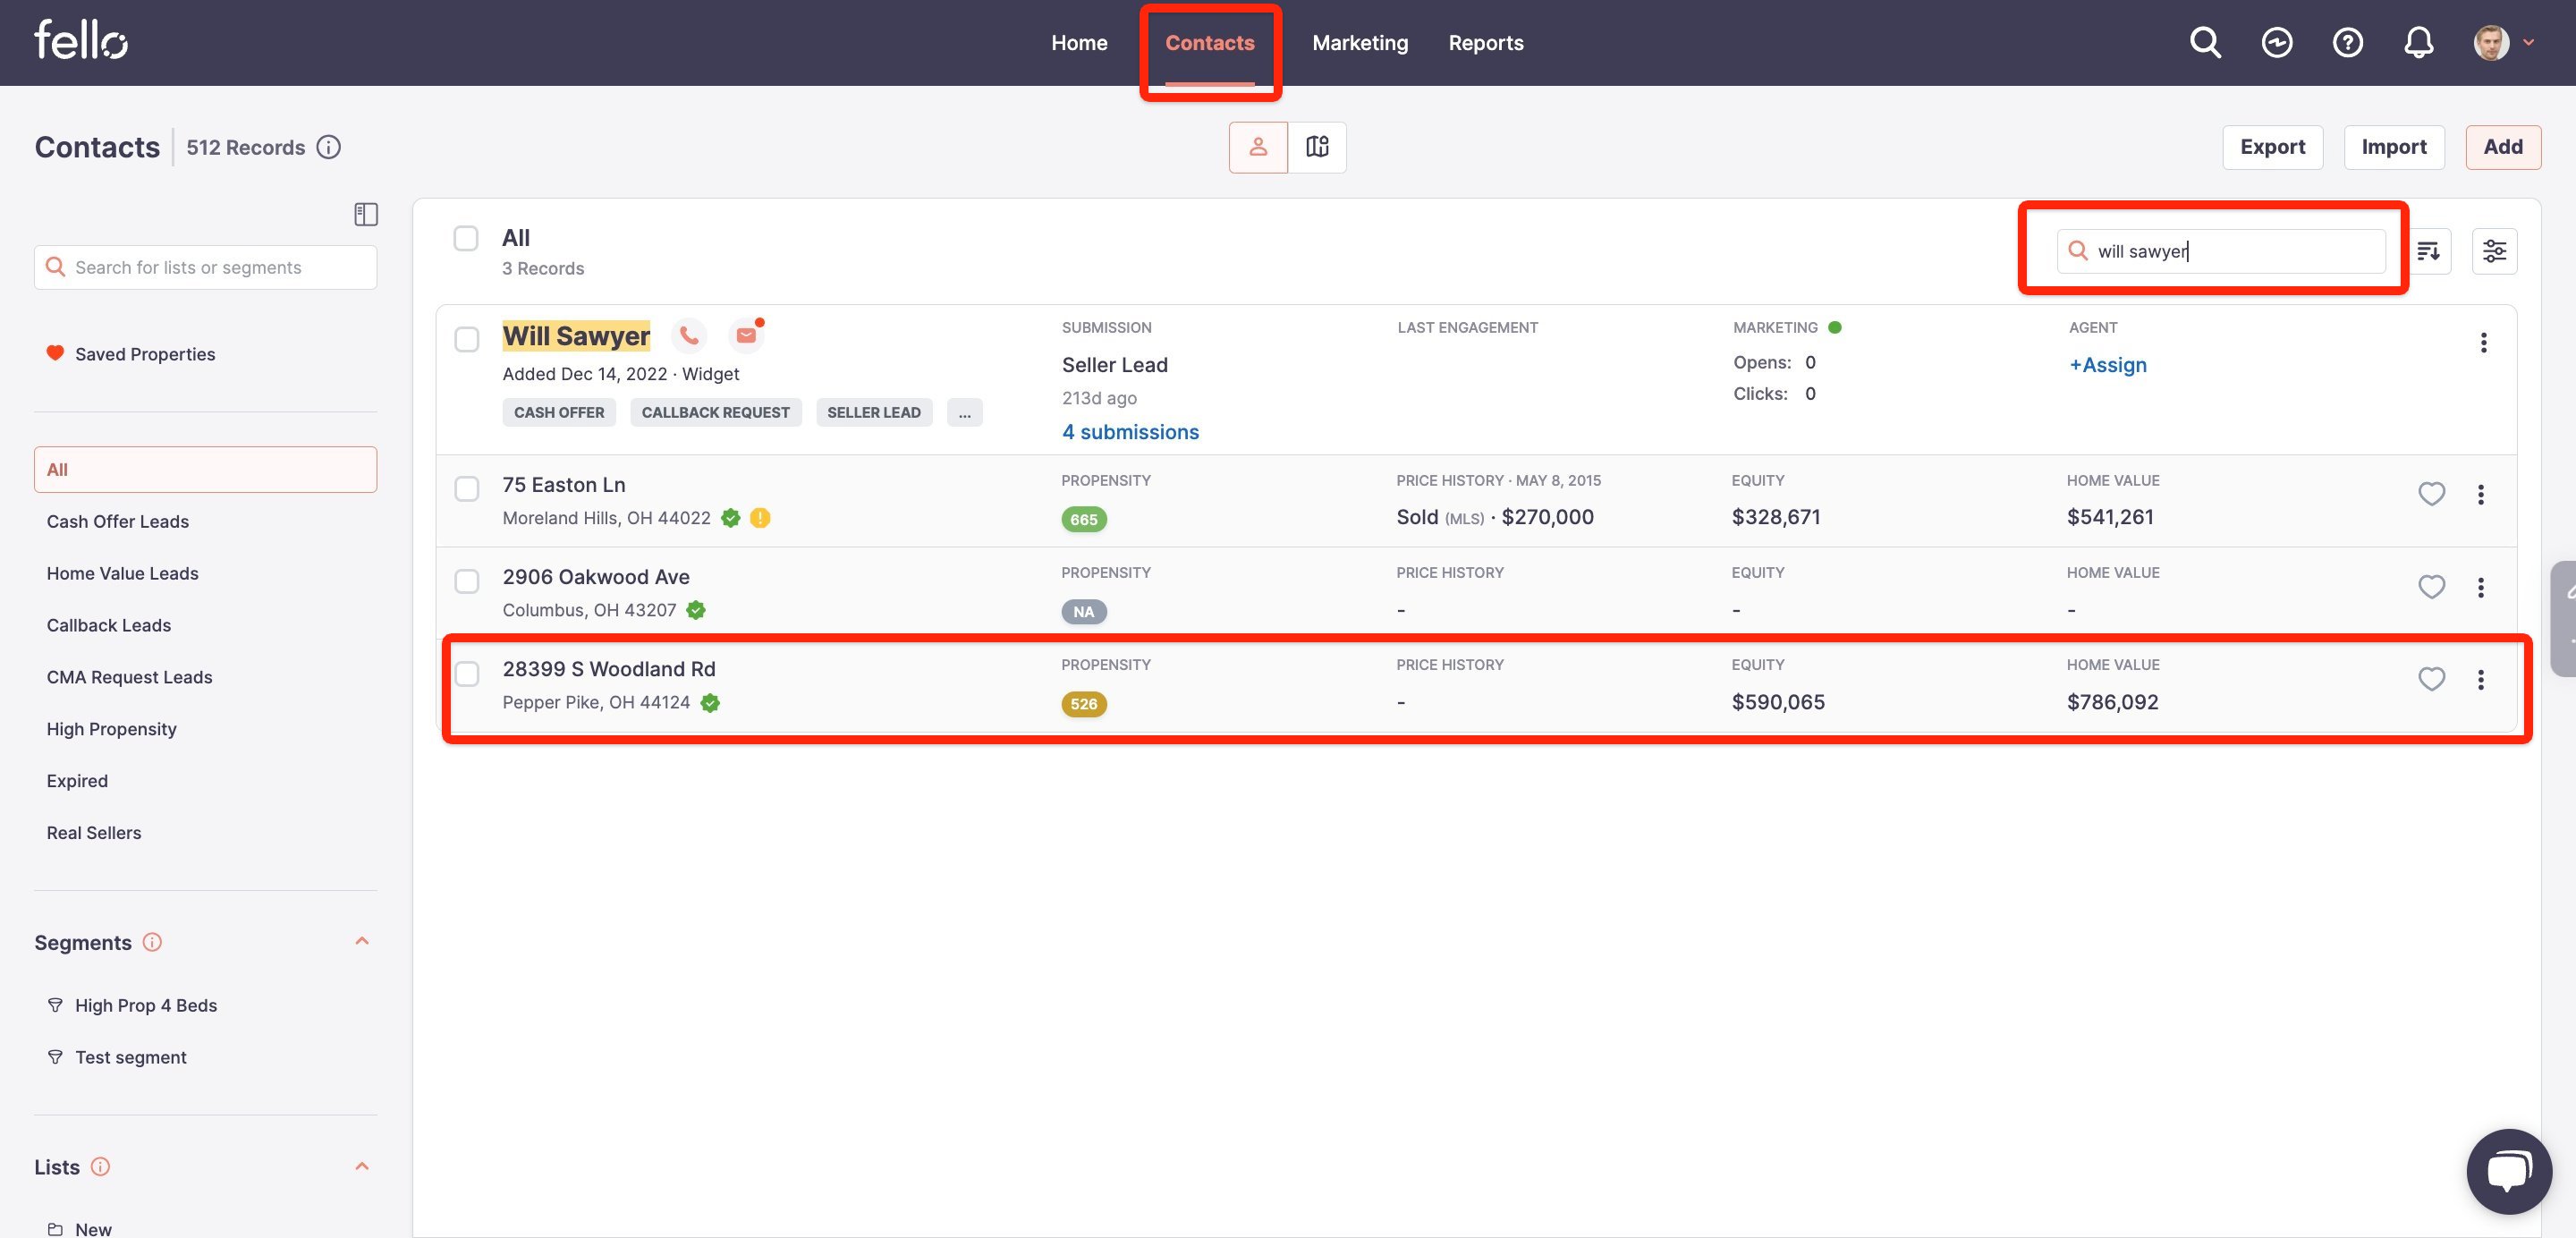
Go to the Contacts tab, and search for the seller that you want to add cash offer for and click on the property. This will open up the property pop-up.
Step 2:
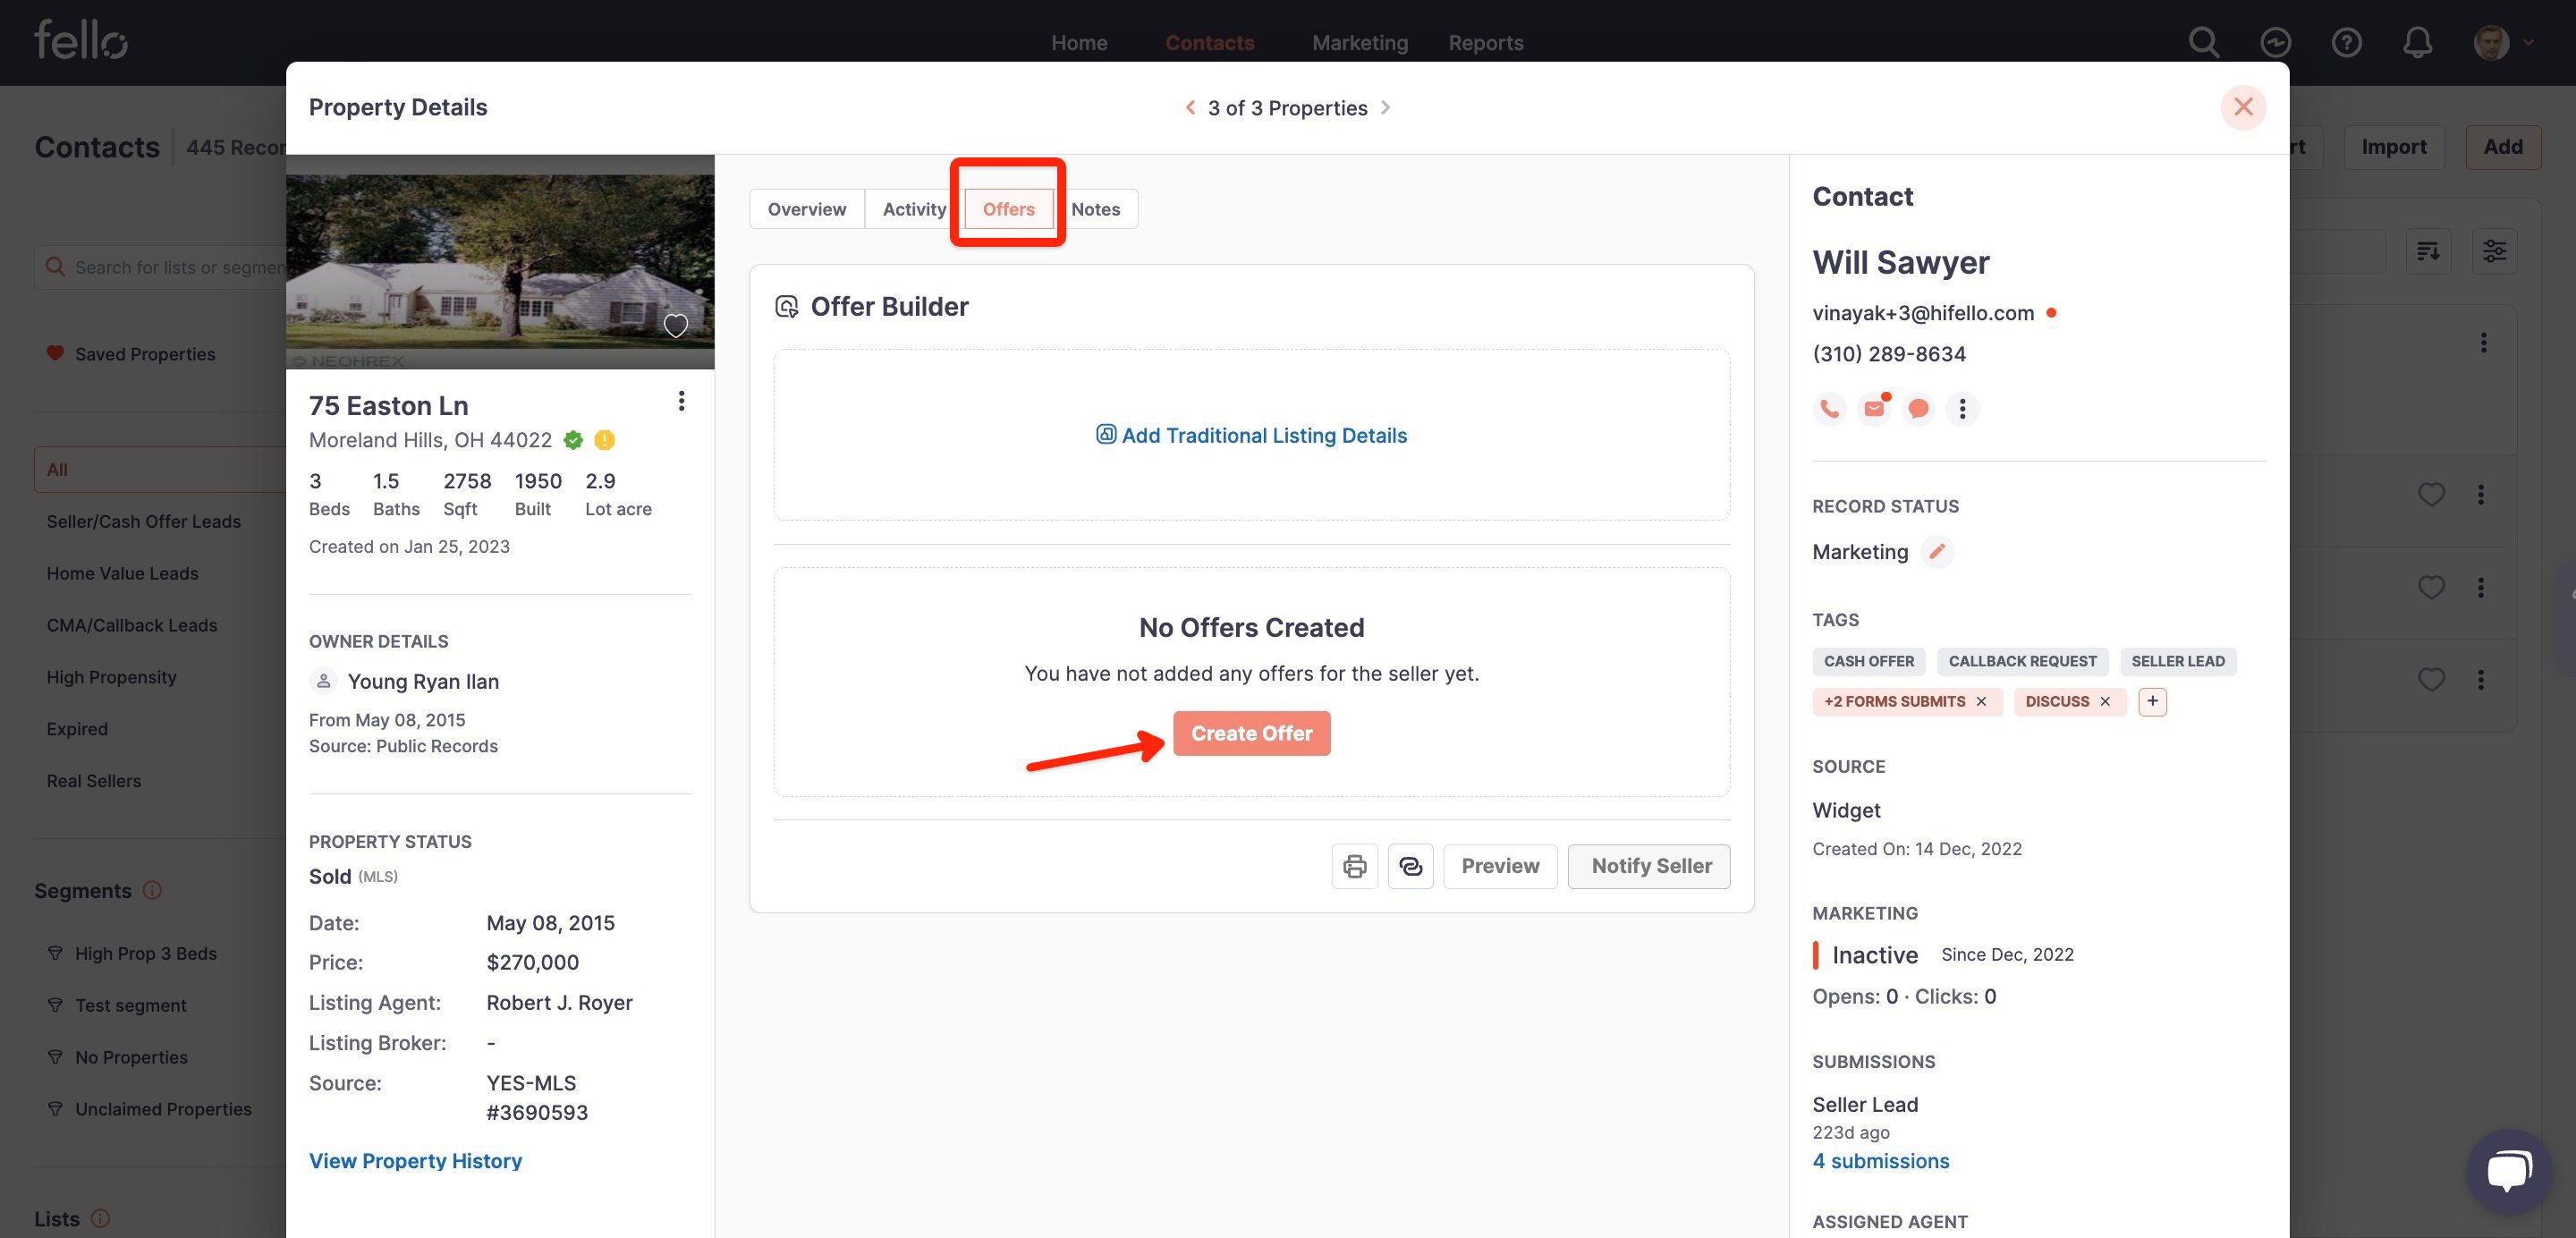
Go to the Offers tab and click on Create Offer.
Step 3:
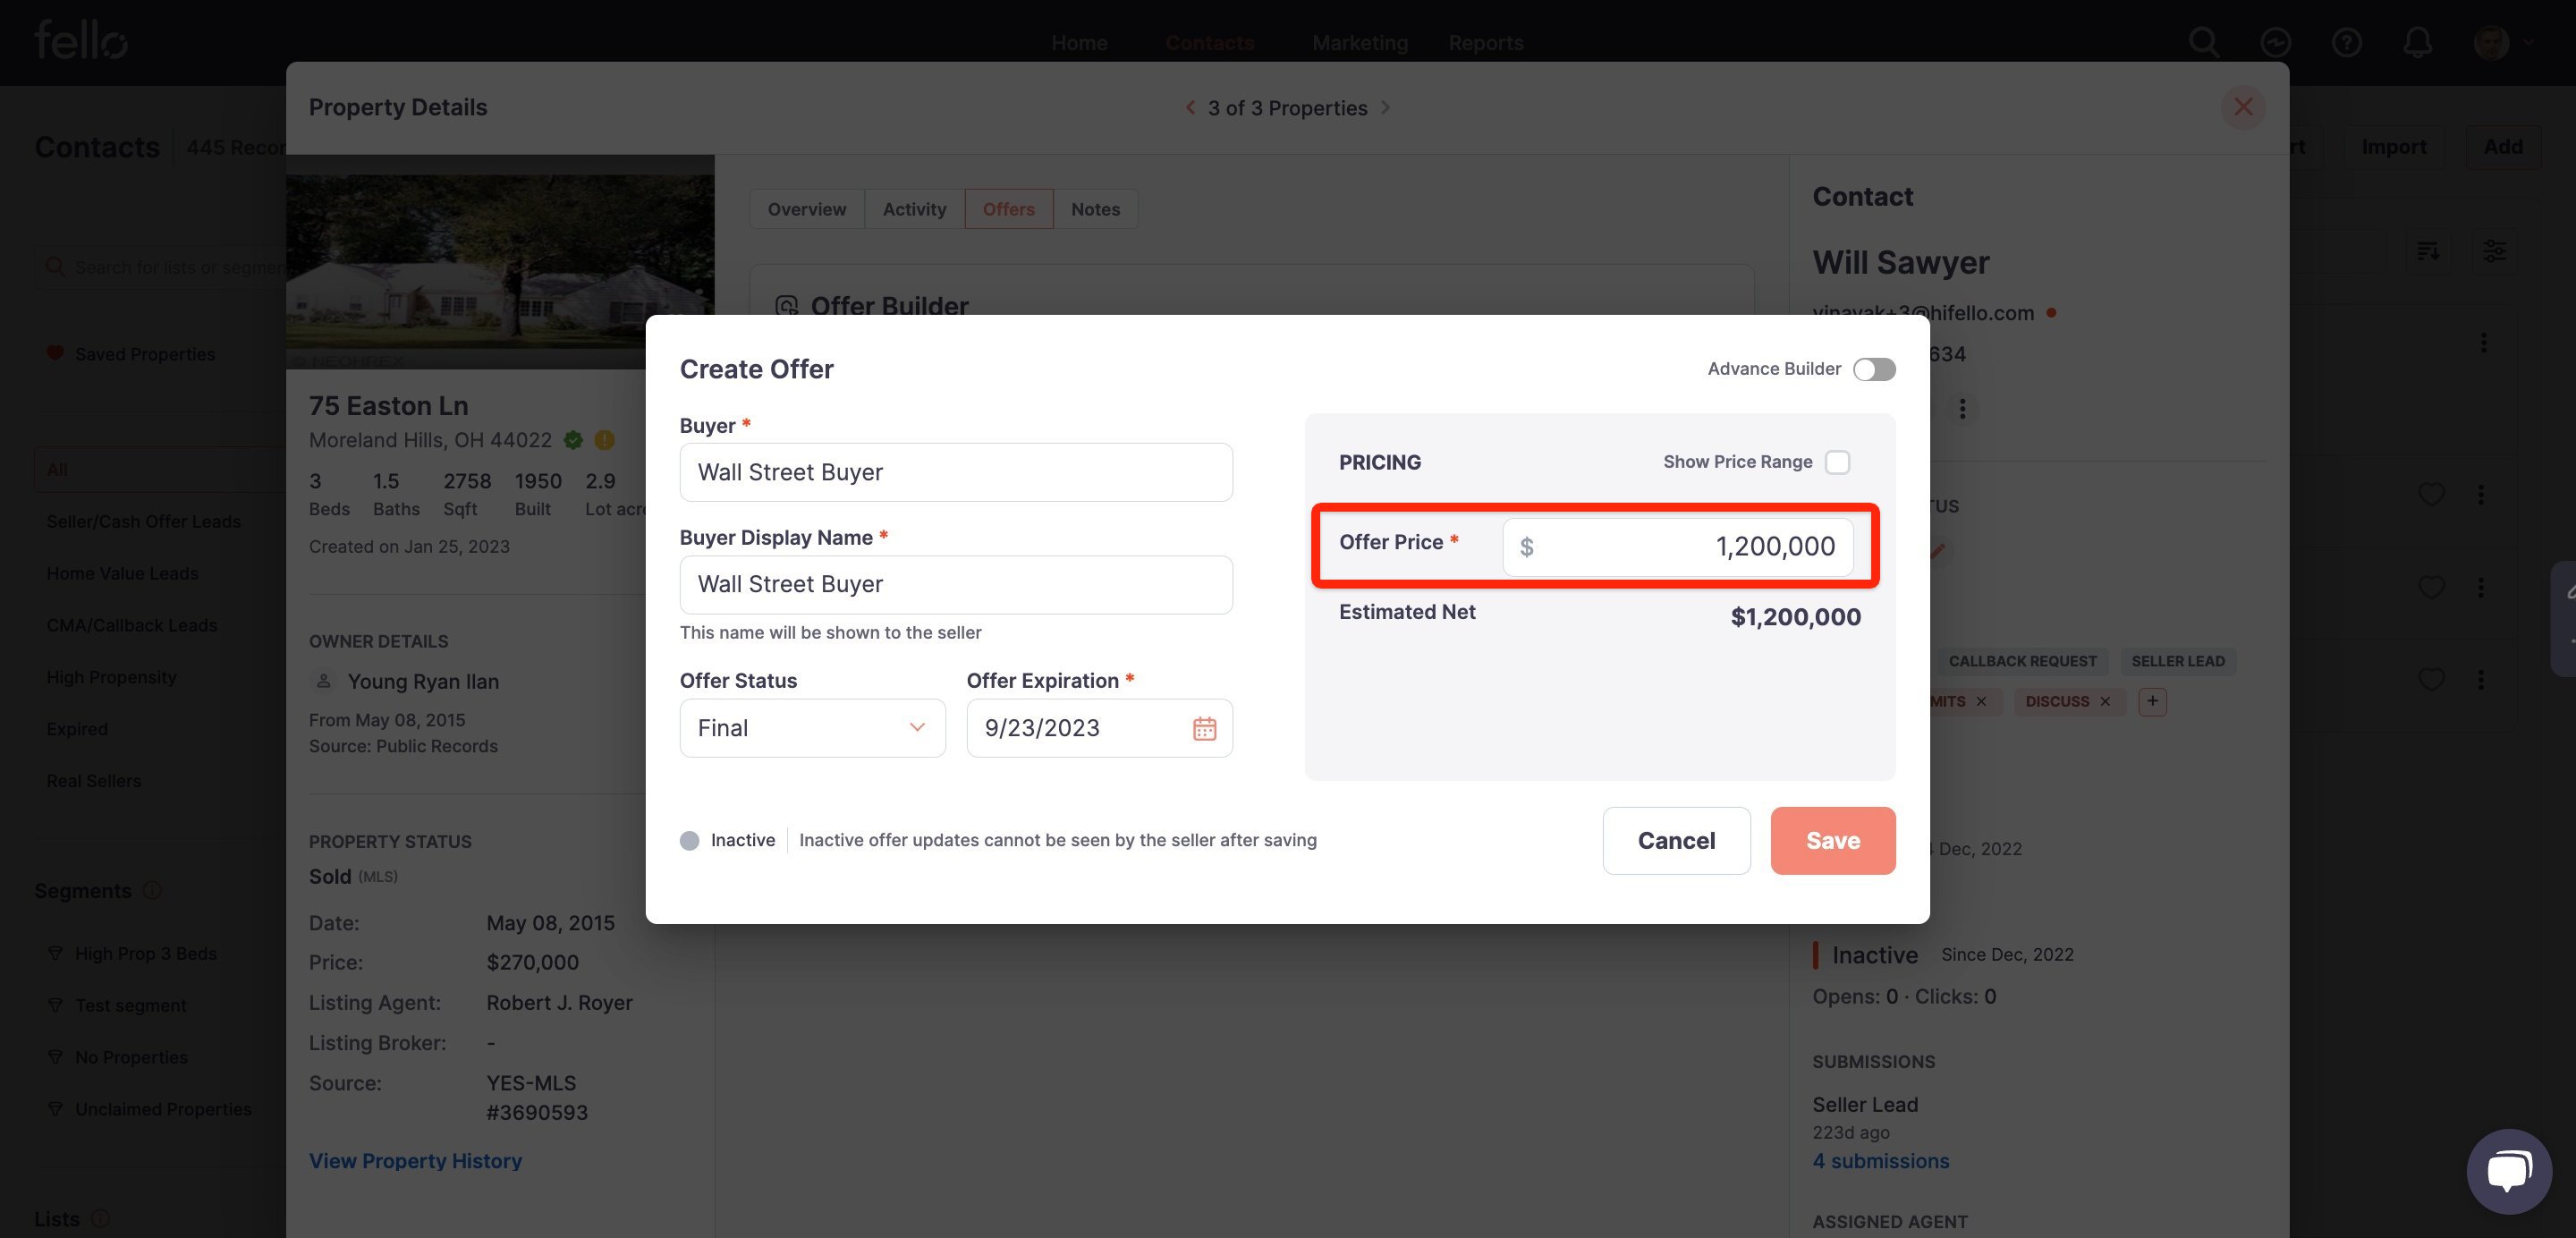
Enter offer details on the popup form. A red asterisk indicates a required field.
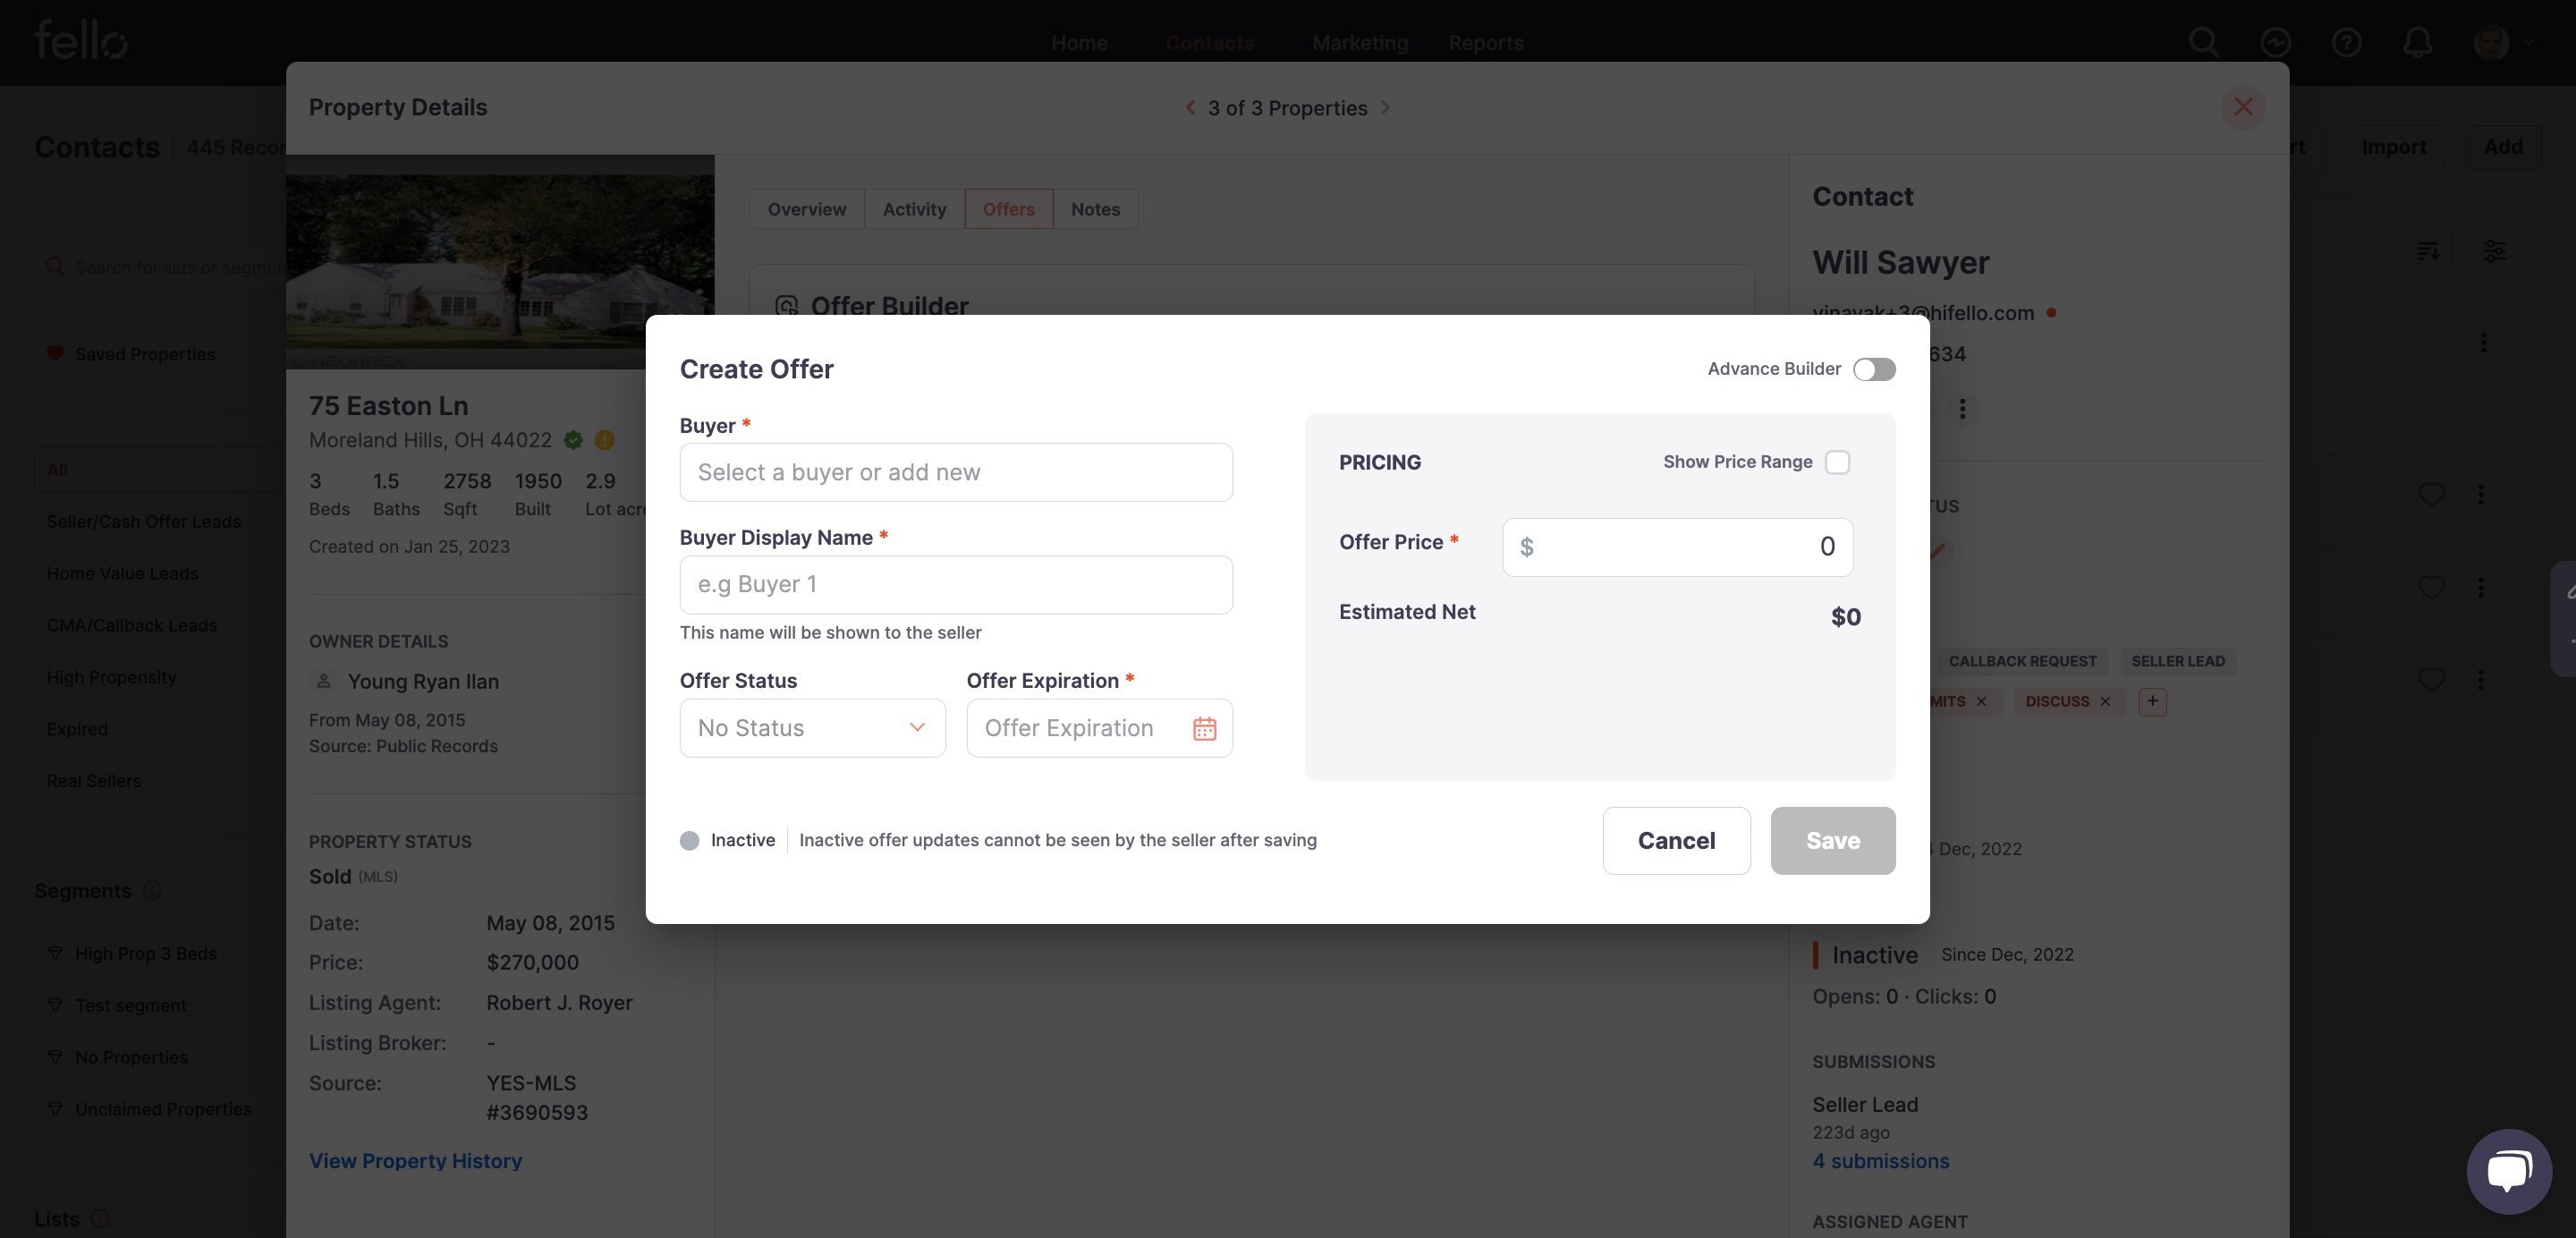
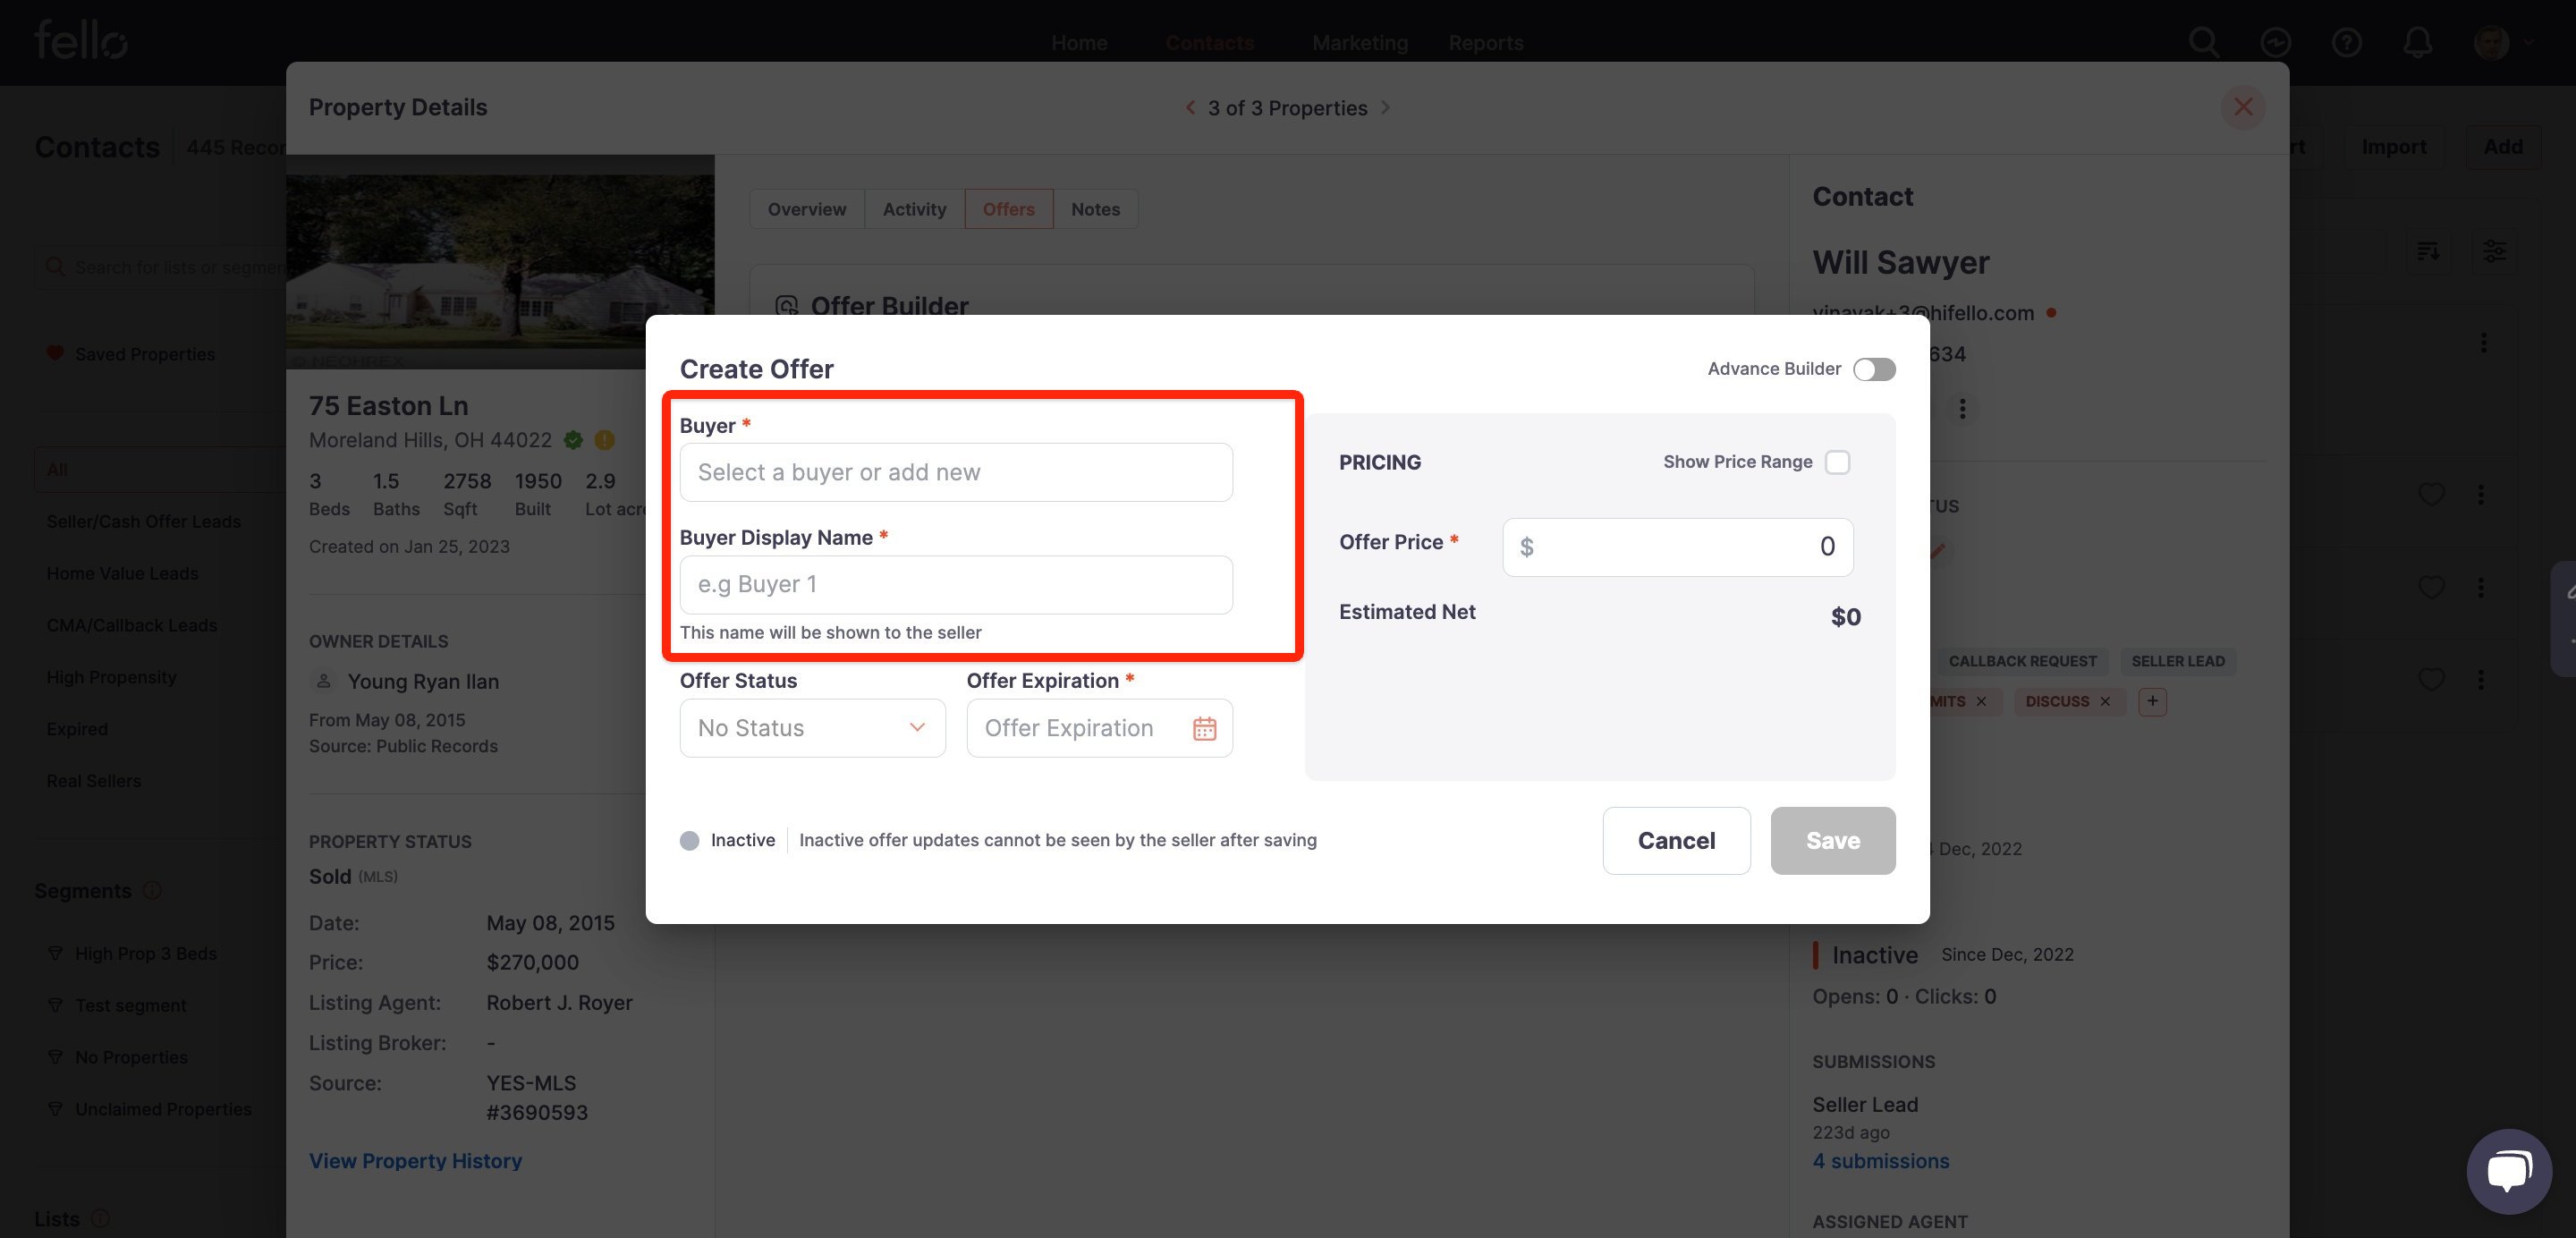
Enter the name of the Buyer. Enter how you want the contact to view the buyer name under Buyer Display Name.
 Select the Offer Status from the dropdown menu as No Status, Preliminary, or Final. Enter the Offer Expiration date.

Enter the Offer Price. The Estimated Net will auto populate.
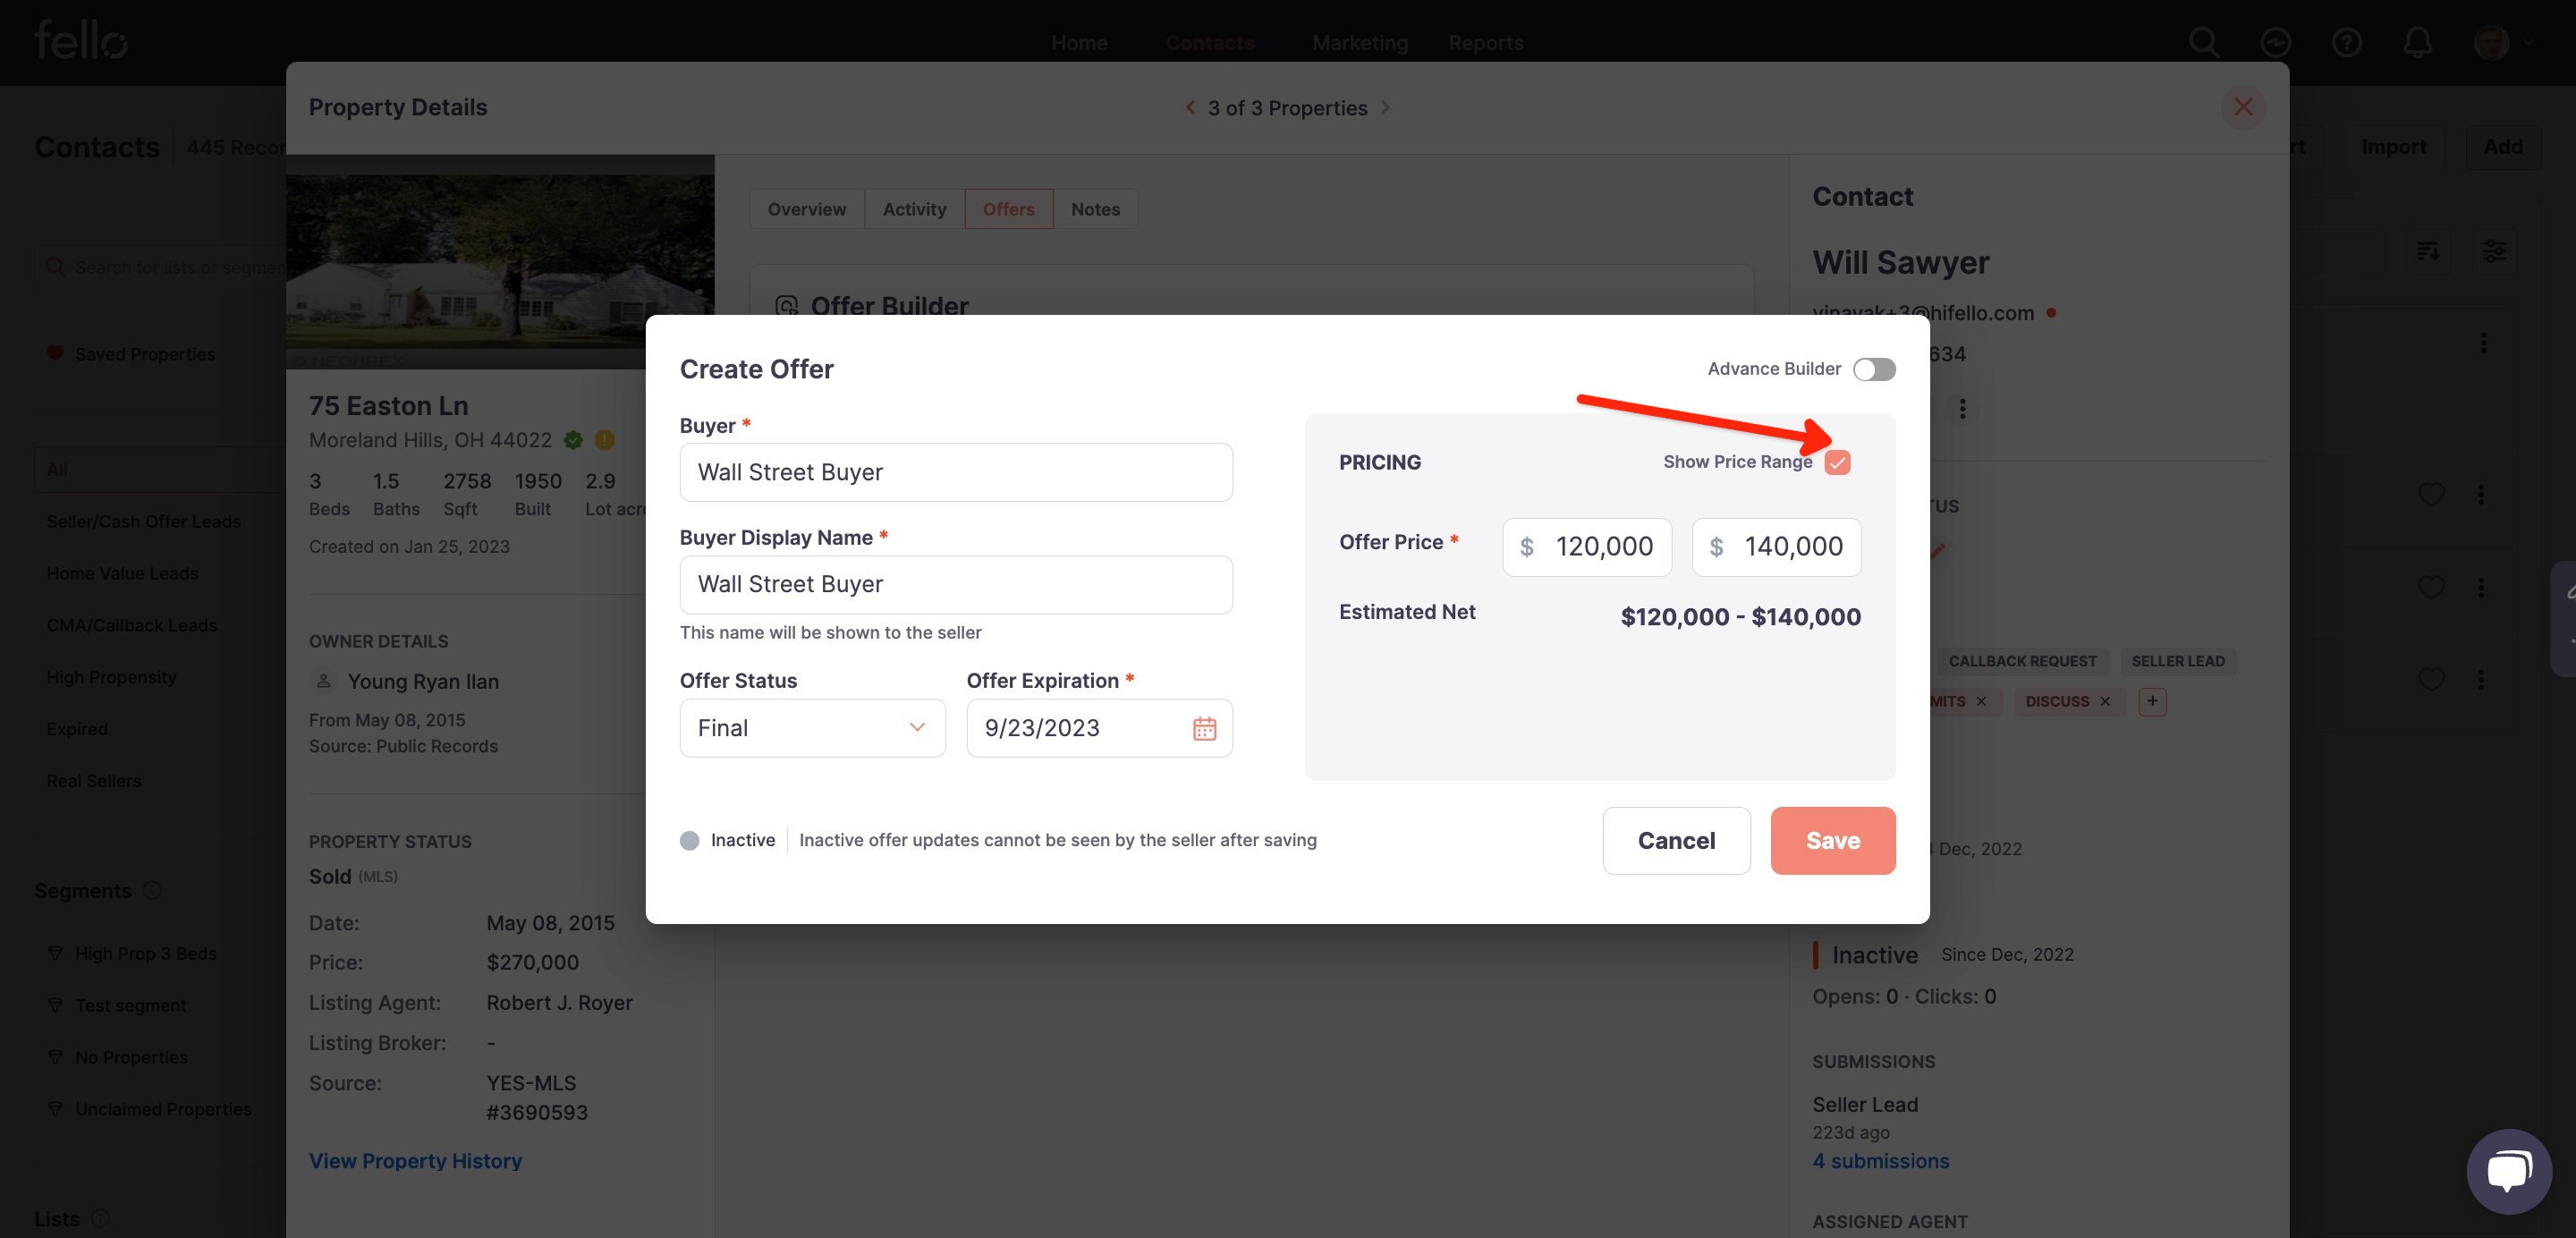
 You can also choose to display a range for the offer price by clicking the box next to Show Price Range. Enter the price range if chosen.
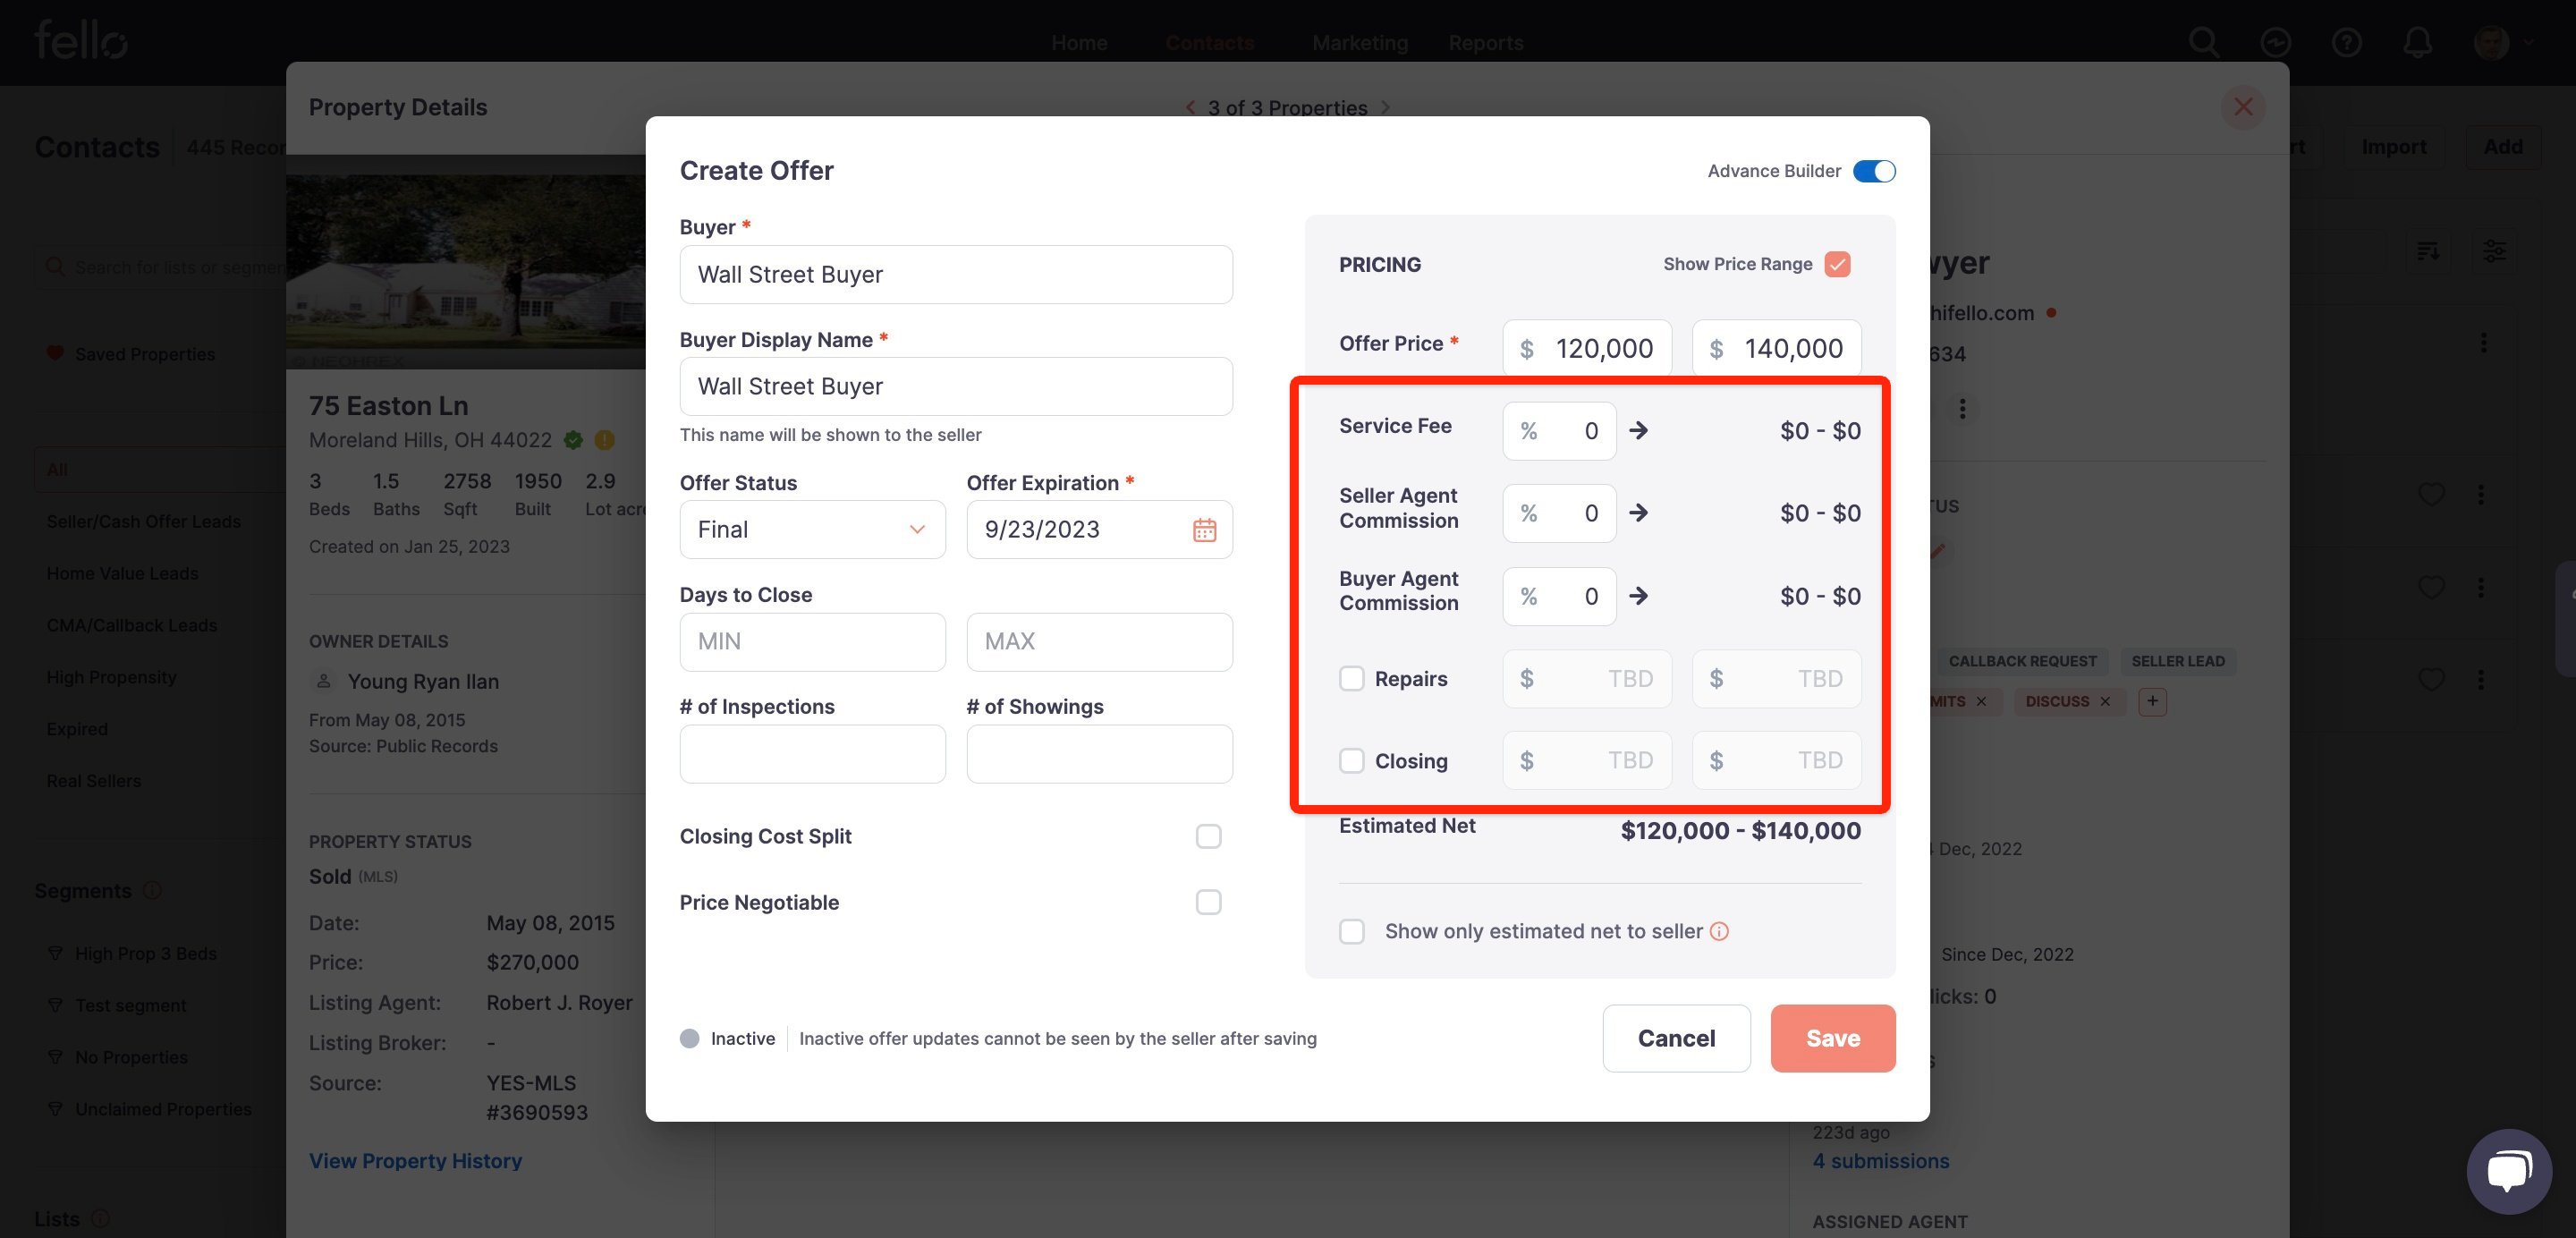
To expose additional fields, toggle Advance Builder on the top right. This will give you the option to add days to close, number of inspections/showings, service fees/commissions, repair costs, and closing costs.
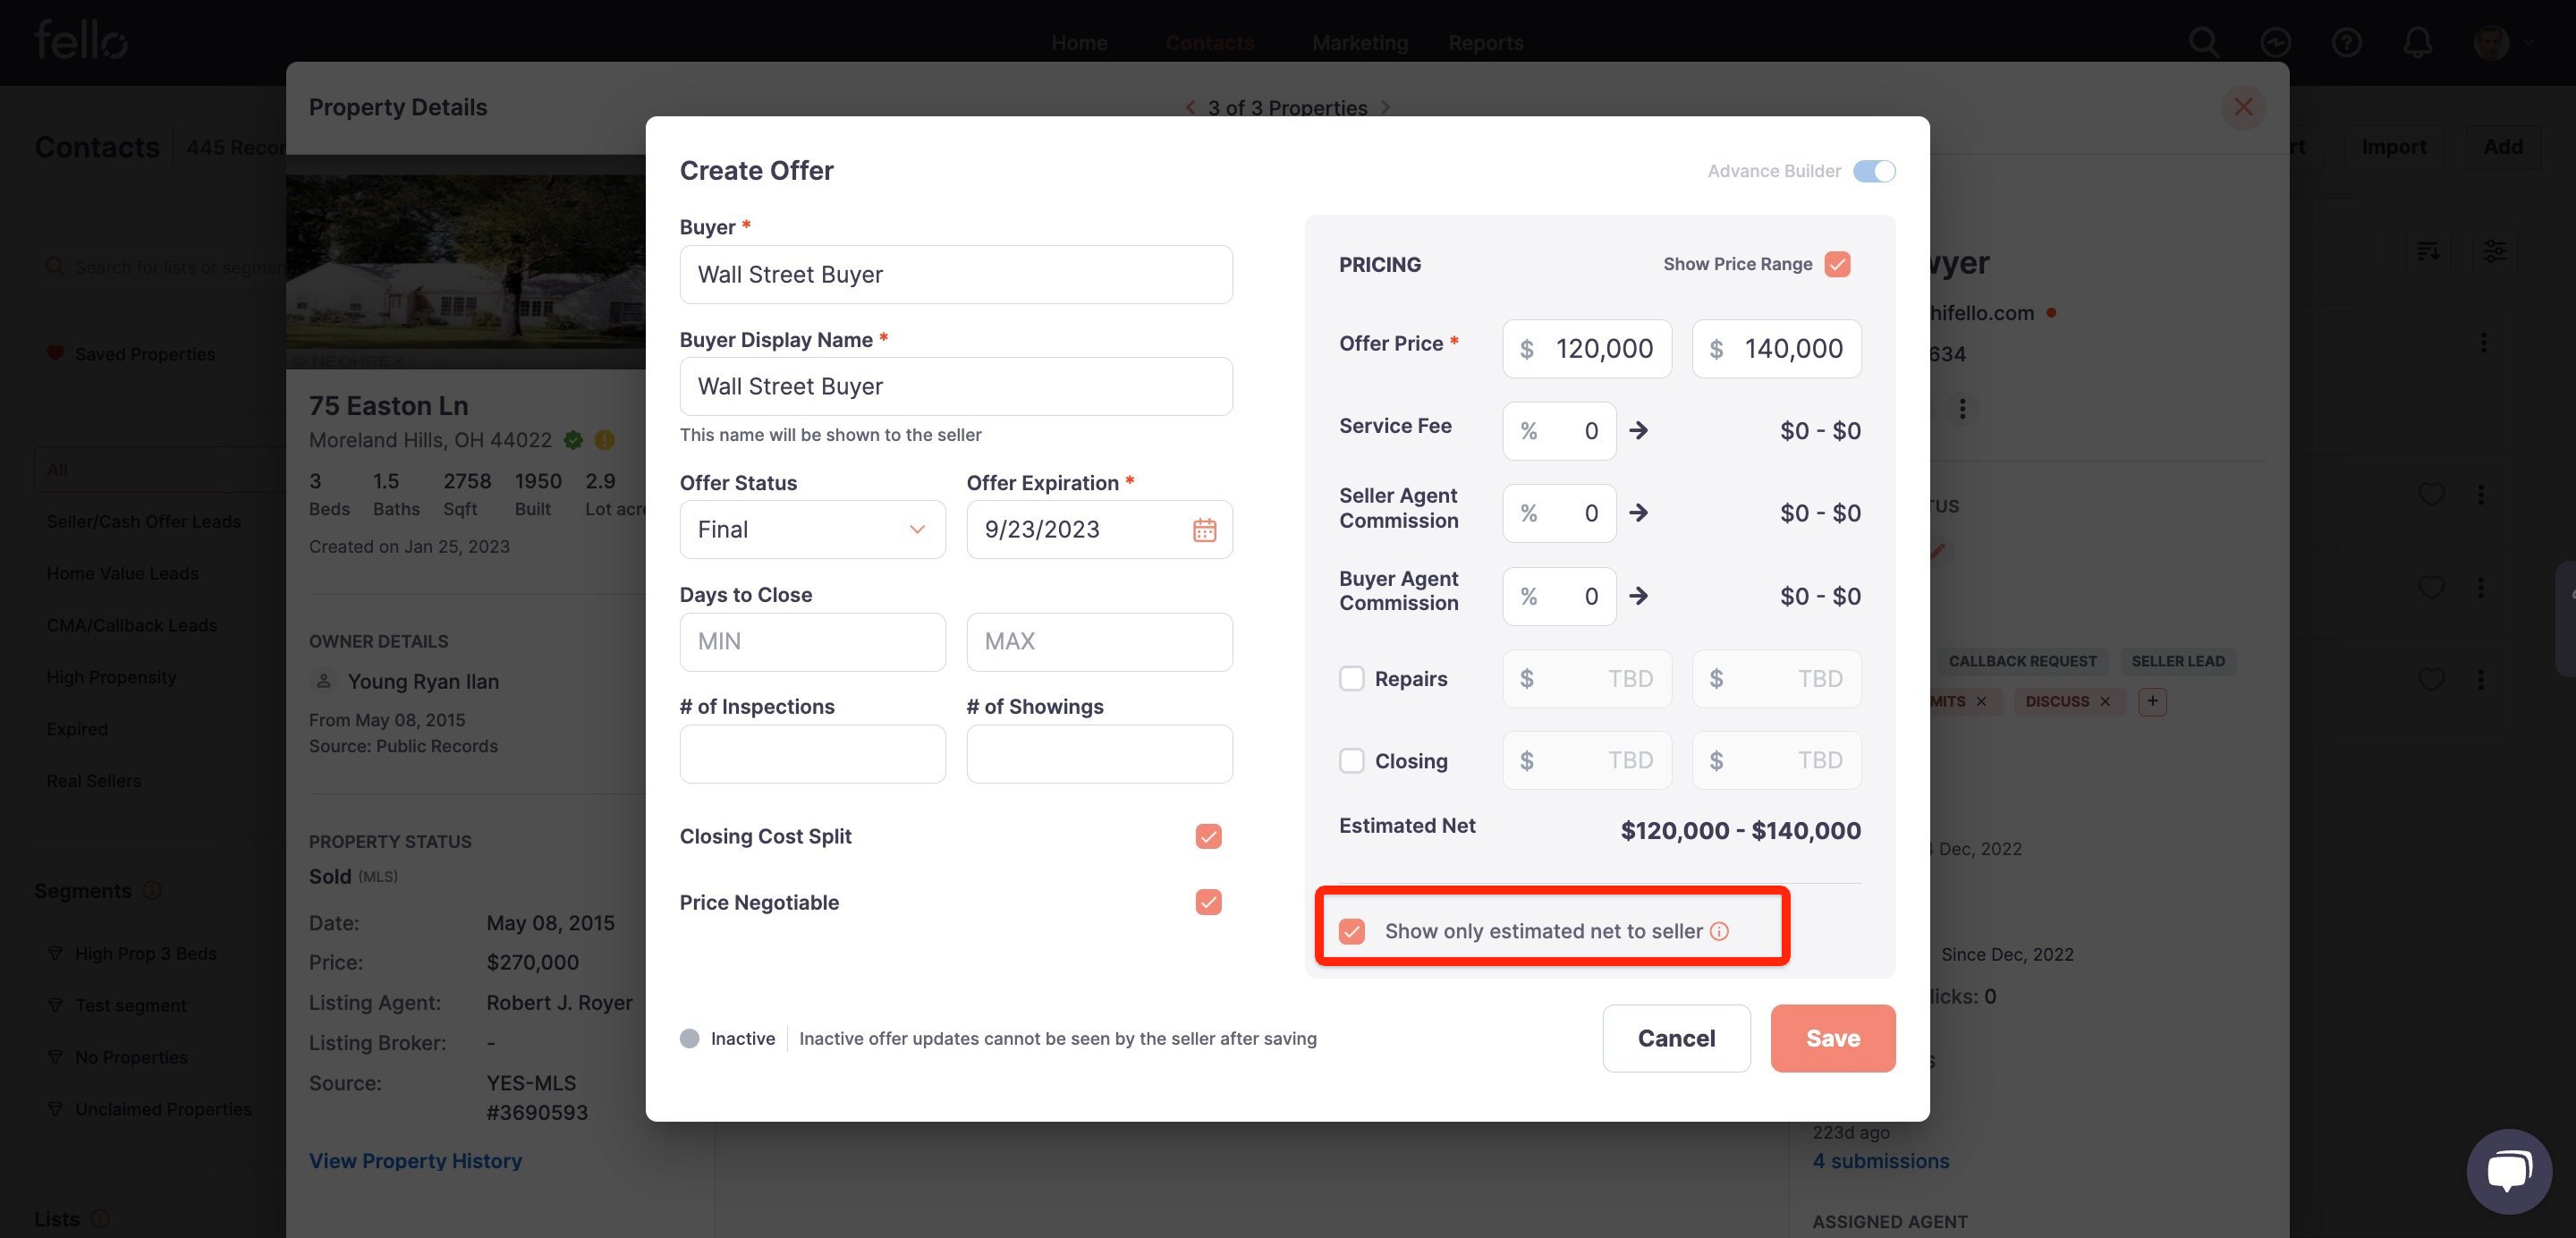
You can also choose whether there will be a closing cost split and whether the price is negotiable by clicking the boxes next to each.

You can make only the estimated net visible to the contact by checking the box next to Show only estimated net to seller.
Click Save once the form is completed to your satisfaction.

You will now be able to view the offer in the Offer Builder. Move the toggle to make the offer Inactive (unable to be published to the contact) or Active (ready to be published to the contact).
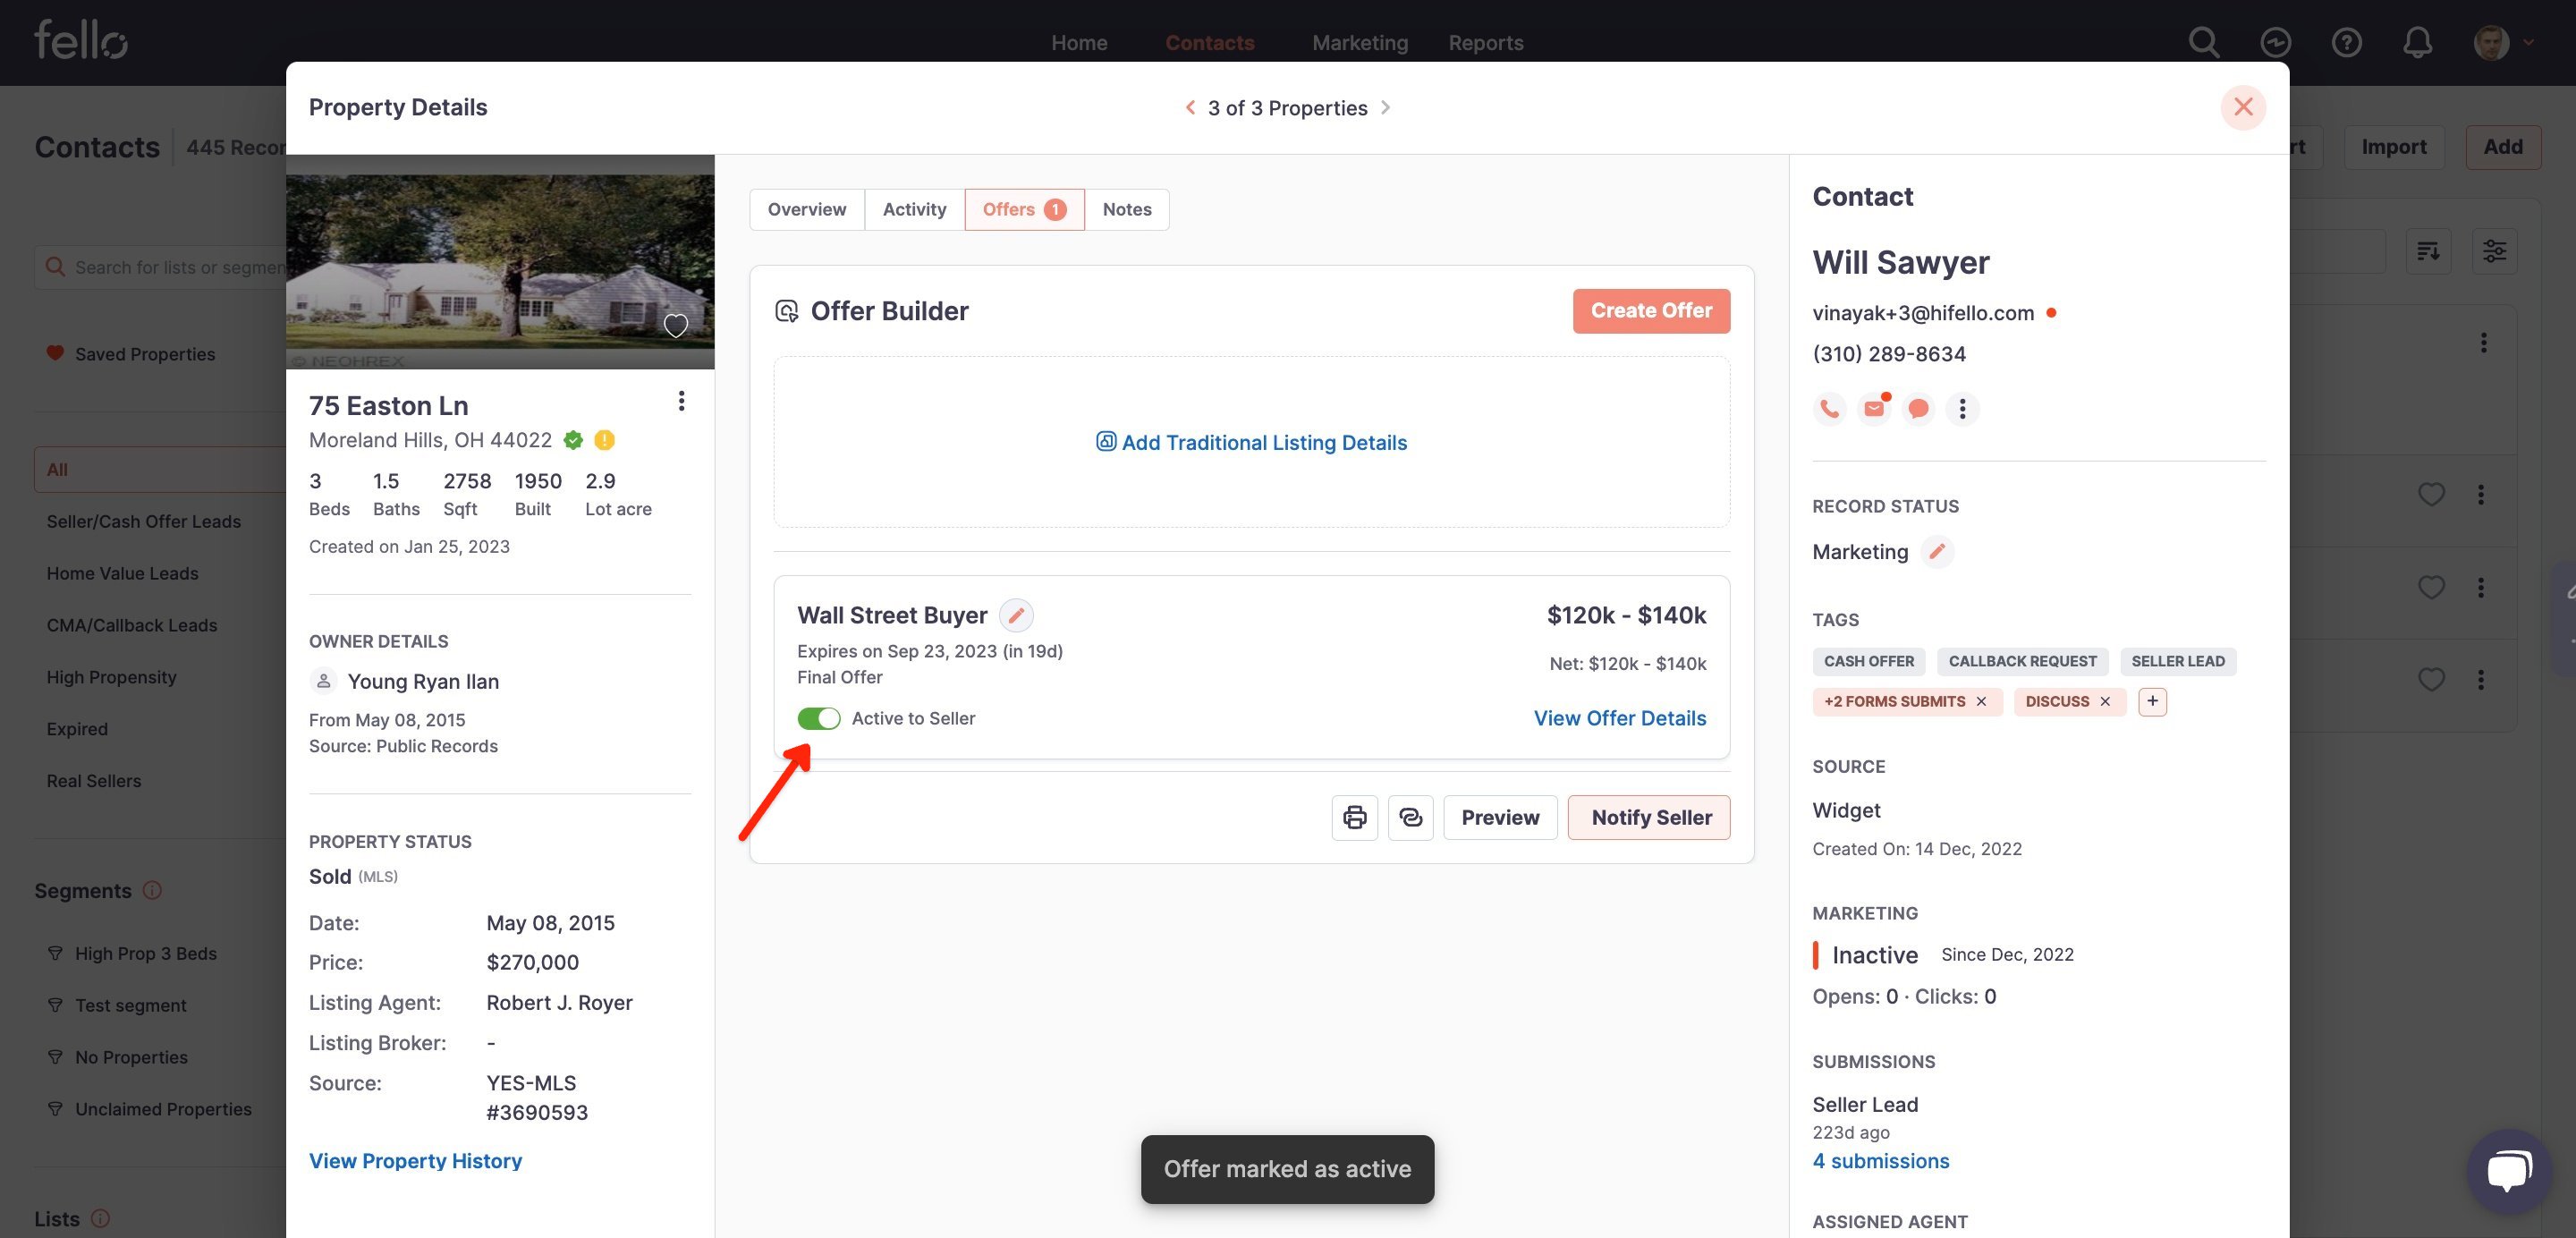
To learn how to publish an offer to a seller, click here.