Quick guide on using Fello's Postcard customization for real estate teams seeking marketing efficiency
The Postcard Content Management feature is designed to enhance marketing automation and lead generation. This feature allows users to create, edit, and manage postcard content used in various marketing automations.
Value Propostion
-
Streamlined Marketing Efficiency: The Postcard Content Management feature simplifies the creation and management of marketing materials. By automating the initial creation process and providing easy-to-edit templates, it significantly reduces the time and effort spent on content development. This efficiency allows our marketing team to allocate more resources towards strategic planning and creative content development.
-
Consistent Brand Messaging: Consistency is key in branding, and this feature ensures that all postcards sent out adhere to our brand standards. With customizable templates that align with our brand identity, every piece of communication reinforces our professional image in the market, building trust and recognition among potential customers.
-
Targeted Lead Generation: The integration of customizable forms with QR codes on postcards allows for more targeted and effective lead generation strategies. By capturing specific customer data and preferences, our marketing campaigns can be more personalized and relevant, increasing the likelihood of conversion and engagement.
-
Data-Driven Insights: Real-time tracking of key performance metrics such as Sent, Delivered, Scans, and Leads offers invaluable insights into the effectiveness of our marketing campaigns. This data-driven approach enables us to optimize our strategies continuously, ensuring that we are always on top of market trends and customer preferences.
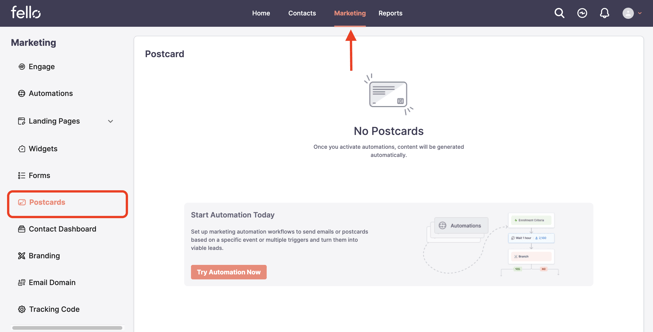
Getting Started with Postcard Content Management
Accessing the Feature:
- Navigate to the 'Postcards' tab under Marketing.
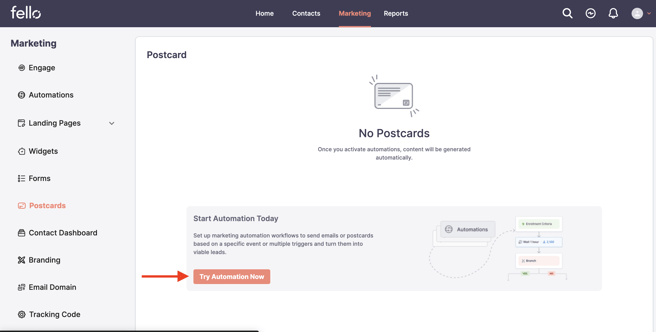
Creating Your Postcard:
- In the 'Marketing Automation' section, click on 'Get Started' to start a new automation and the associated postcards as part of the automation will be automatically created the system.
Users can modify content in the postcards but cannot create new postcards.
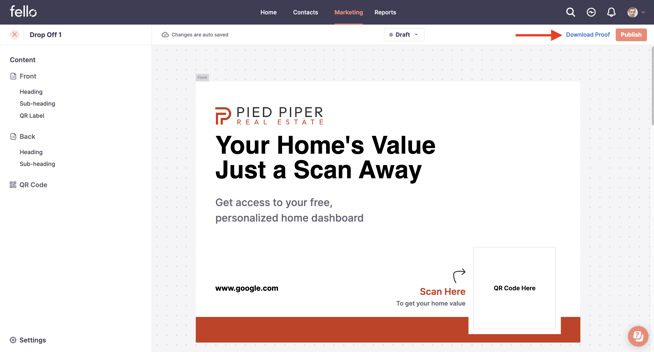
Customizing Your Postcard:
User can edit a content from the automation page and the content will open in a new tab. User can also come to Contents tab and edit contents.
Users should be able to click within an action within an automation and must be able to navigate to the content editing. Users will be editing the content outside of the automation.
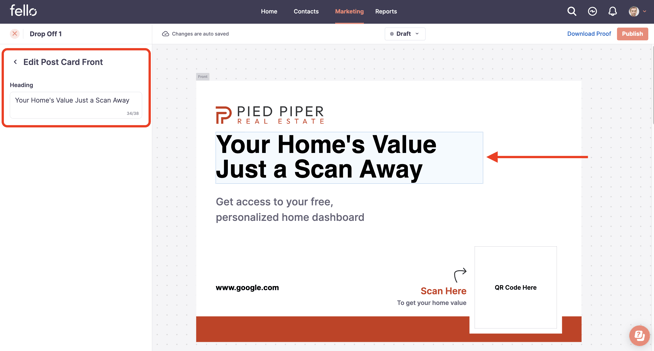
Editing Content:
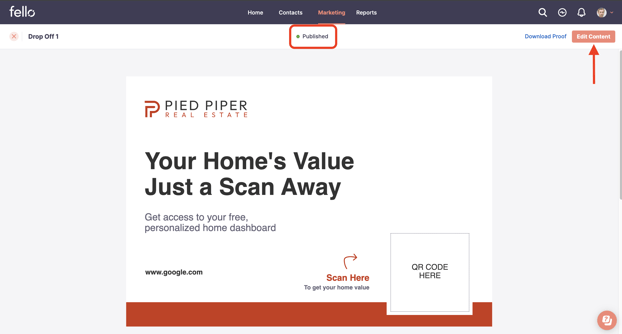
- Click on the draft postcard to open the editing interface.
- You'll see the front and back of the postcard.
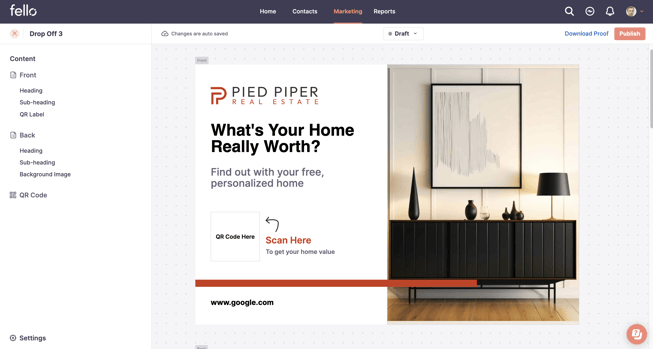
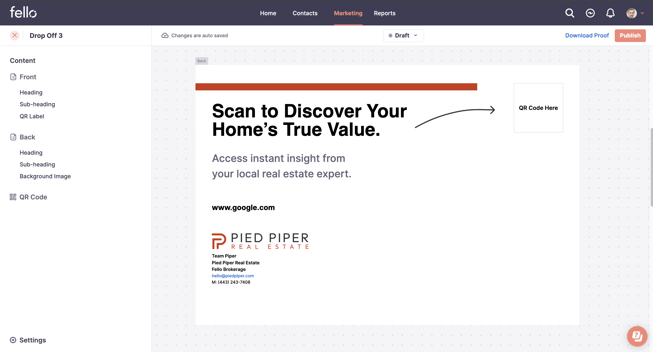
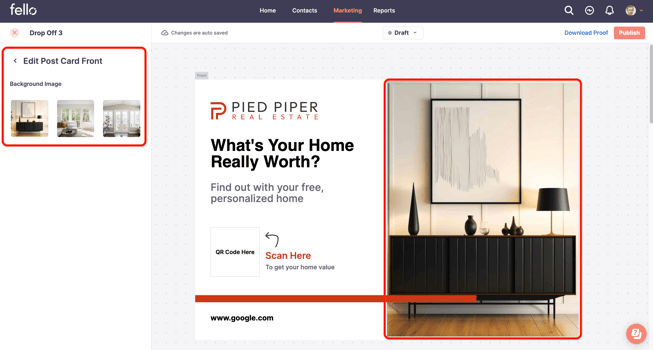
Customizing Text and Images:
- To edit text, simply click on the headings or subheadings and type in your content.
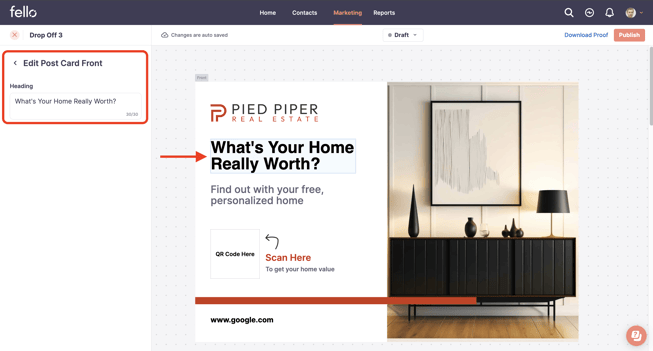
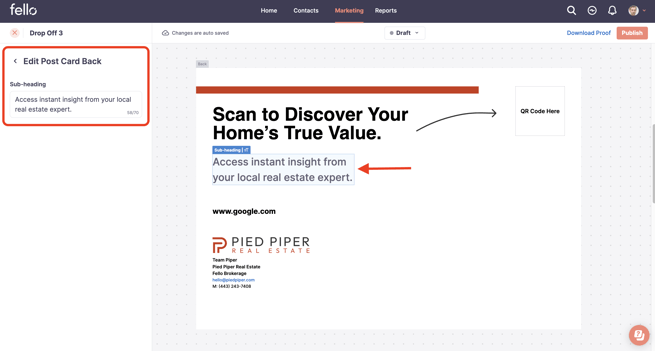
- To change images, select the image area and choose from the image library.
Choosing Forms for QR Codes:
- Decide which form(s) you want potential clients to fill out when they scan the QR code on the postcard. Options include Home Value Form, Cash Offer Form, Seller Form, or a combination.
Print Settings Setup under Branding:
By default, all postcard branding be done with the default brand. If the Print Settings of default brand is not setup, when the user comes to content screen or tries to edit a content from automation screen, the user will see an option to complete the Print Settings before they can edit a Postcard content.
Finalizing and Tracking Your Postcard
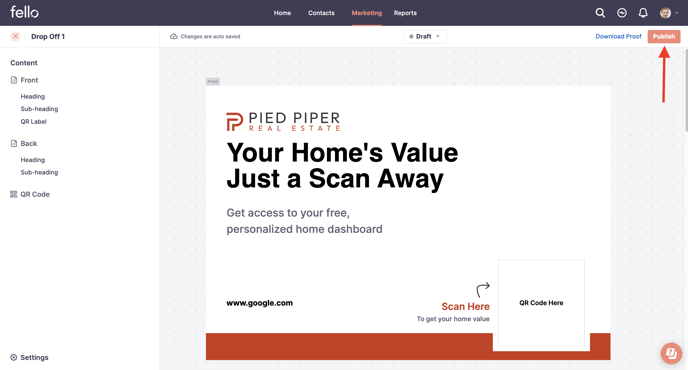
Proofing and Publishing:
- Once you're satisfied with your edits, download a proof of the postcard.
- Review the proof and then publish your postcard.
-
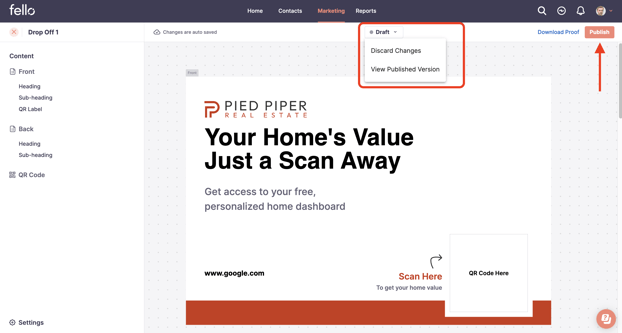
Once a user tries to edit a published content, a draft version of the content will be created and the user can edit the draft version. Once the user publishes the draft version, the previous published version is replaced by the current published version.
-
If the user does not publish the draft version, when they come back later to edit, they can see the previous draft version. At that point, they can choose to edit the draft version or discard the draft version and create another draft with the current published version and edit the version. At any point of time, the system has a published version and draft version only.
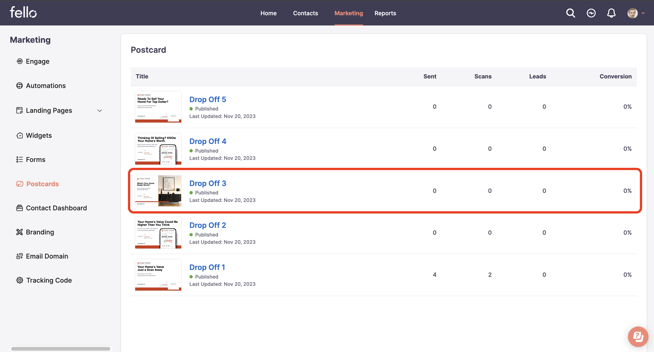
Tracking Performance:
- Access the Content List page to view metrics like Sent, Delivered, ScansAc, and Leads for each content.
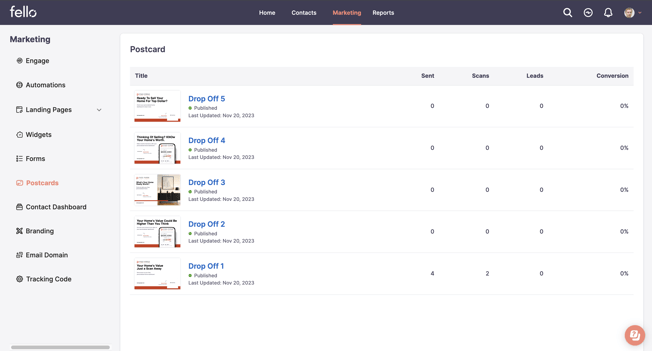
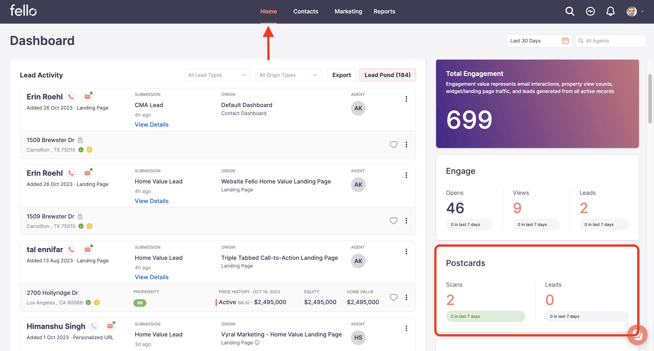
- Access the Home Page to view Postcard performance for all postcards.
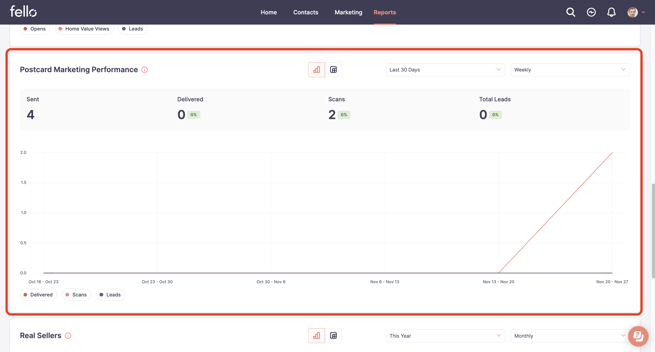
- Access the Report page to view reporting on Postcard marketing performance.
Note:
Same content can be mapped in different actions within the same automation. While editing such content, we should alert the user that the changes will reflect in all actions and all automations where this content is used.
If a content is changed, the changes will be immediately seen in the action in all the automations which the content is part of.
Tips for Effective Postcard Marketing
- Keep Branding Consistent: Make sure your postcards align with your branding for a professional look.
- Personalize Your Message: Tailor the content to resonate with your target audience.
- Use High-Quality Images: Choose images that are attractive and relevant to your message.
- Track and Adjust: Regularly check your postcard performance and adjust your strategies as needed.
Conclusion
The Postcard Content Management feature is a powerful tool that can significantly boost your marketing efforts. By following these steps and utilizing the customization options available, you can create engaging and effective marketing materials that resonate with your audience. Remember to regularly review and adjust your strategies based on the feedback and performance metrics from your campaigns.