In Fello, you can add tons of data to your contacts that can later be used for filtering a group of contacts. With the help of filters, you can easily locate individuals according to categories such as stage, tags, most recent engagement, and many more criteria.
How to Access Filters in Fello
- Navigate to the Contacts tab.
- Look for the 'Filter' button towards the interface's top right.
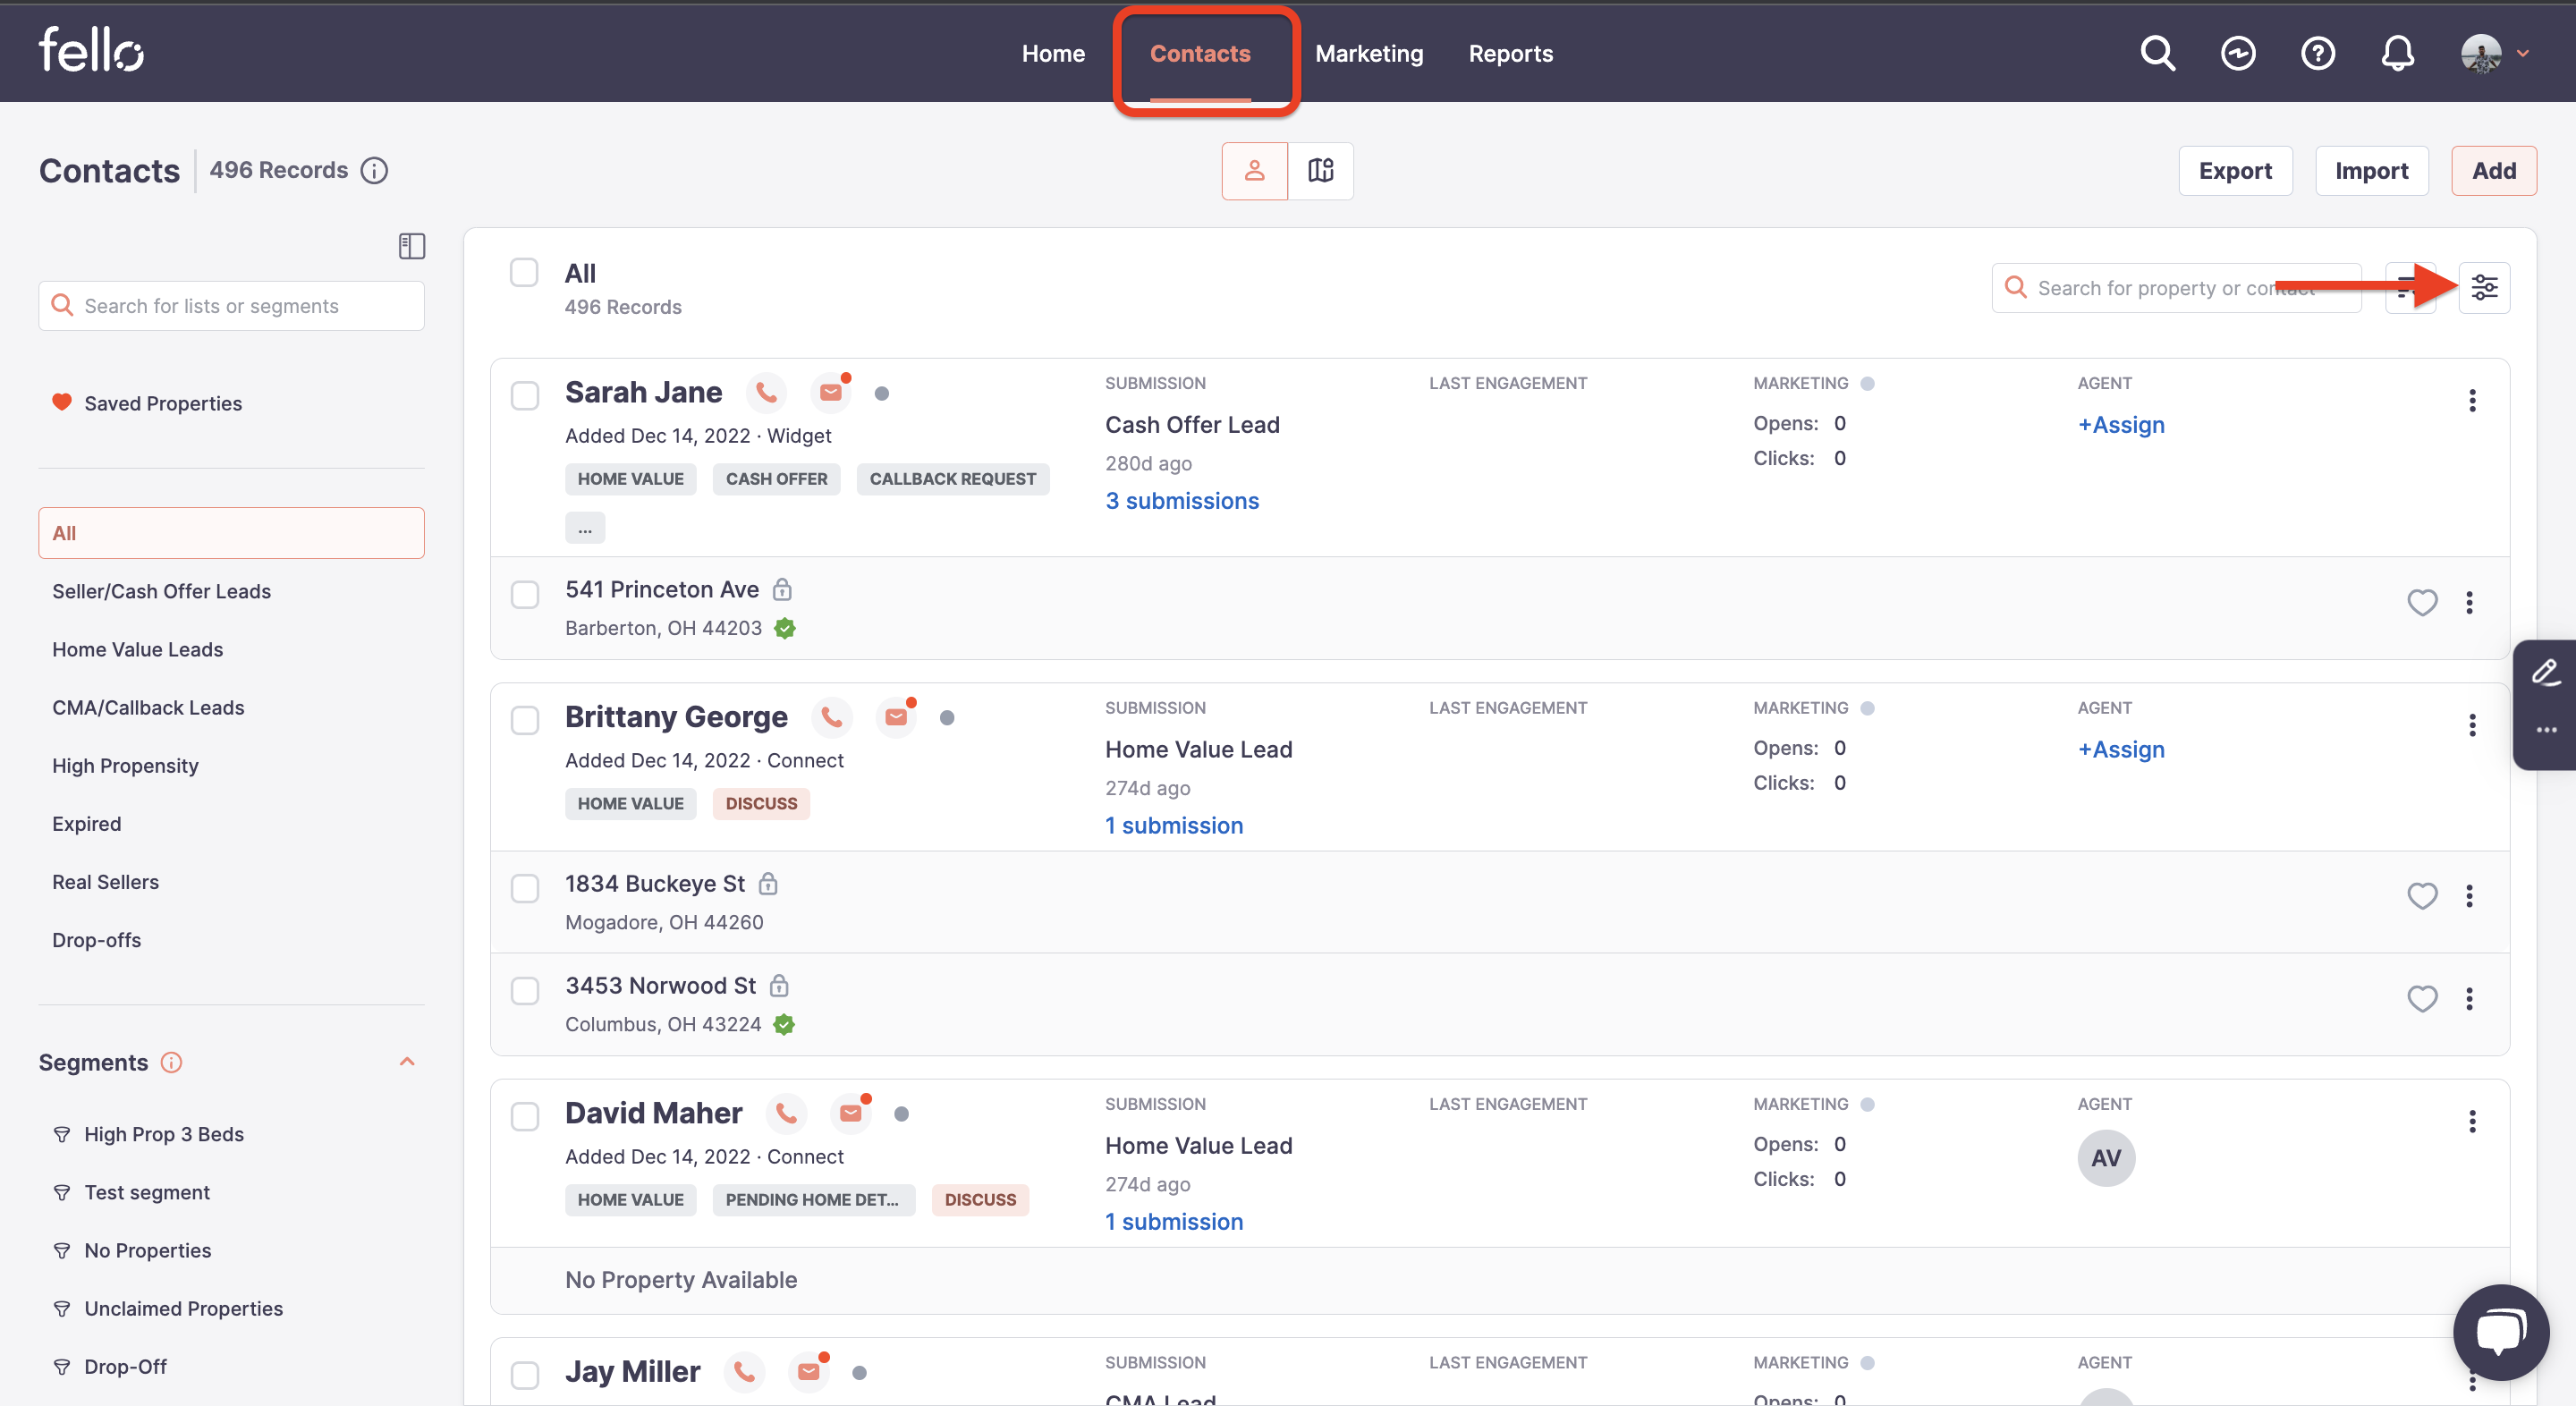
- Click on this button to expand the filter options.
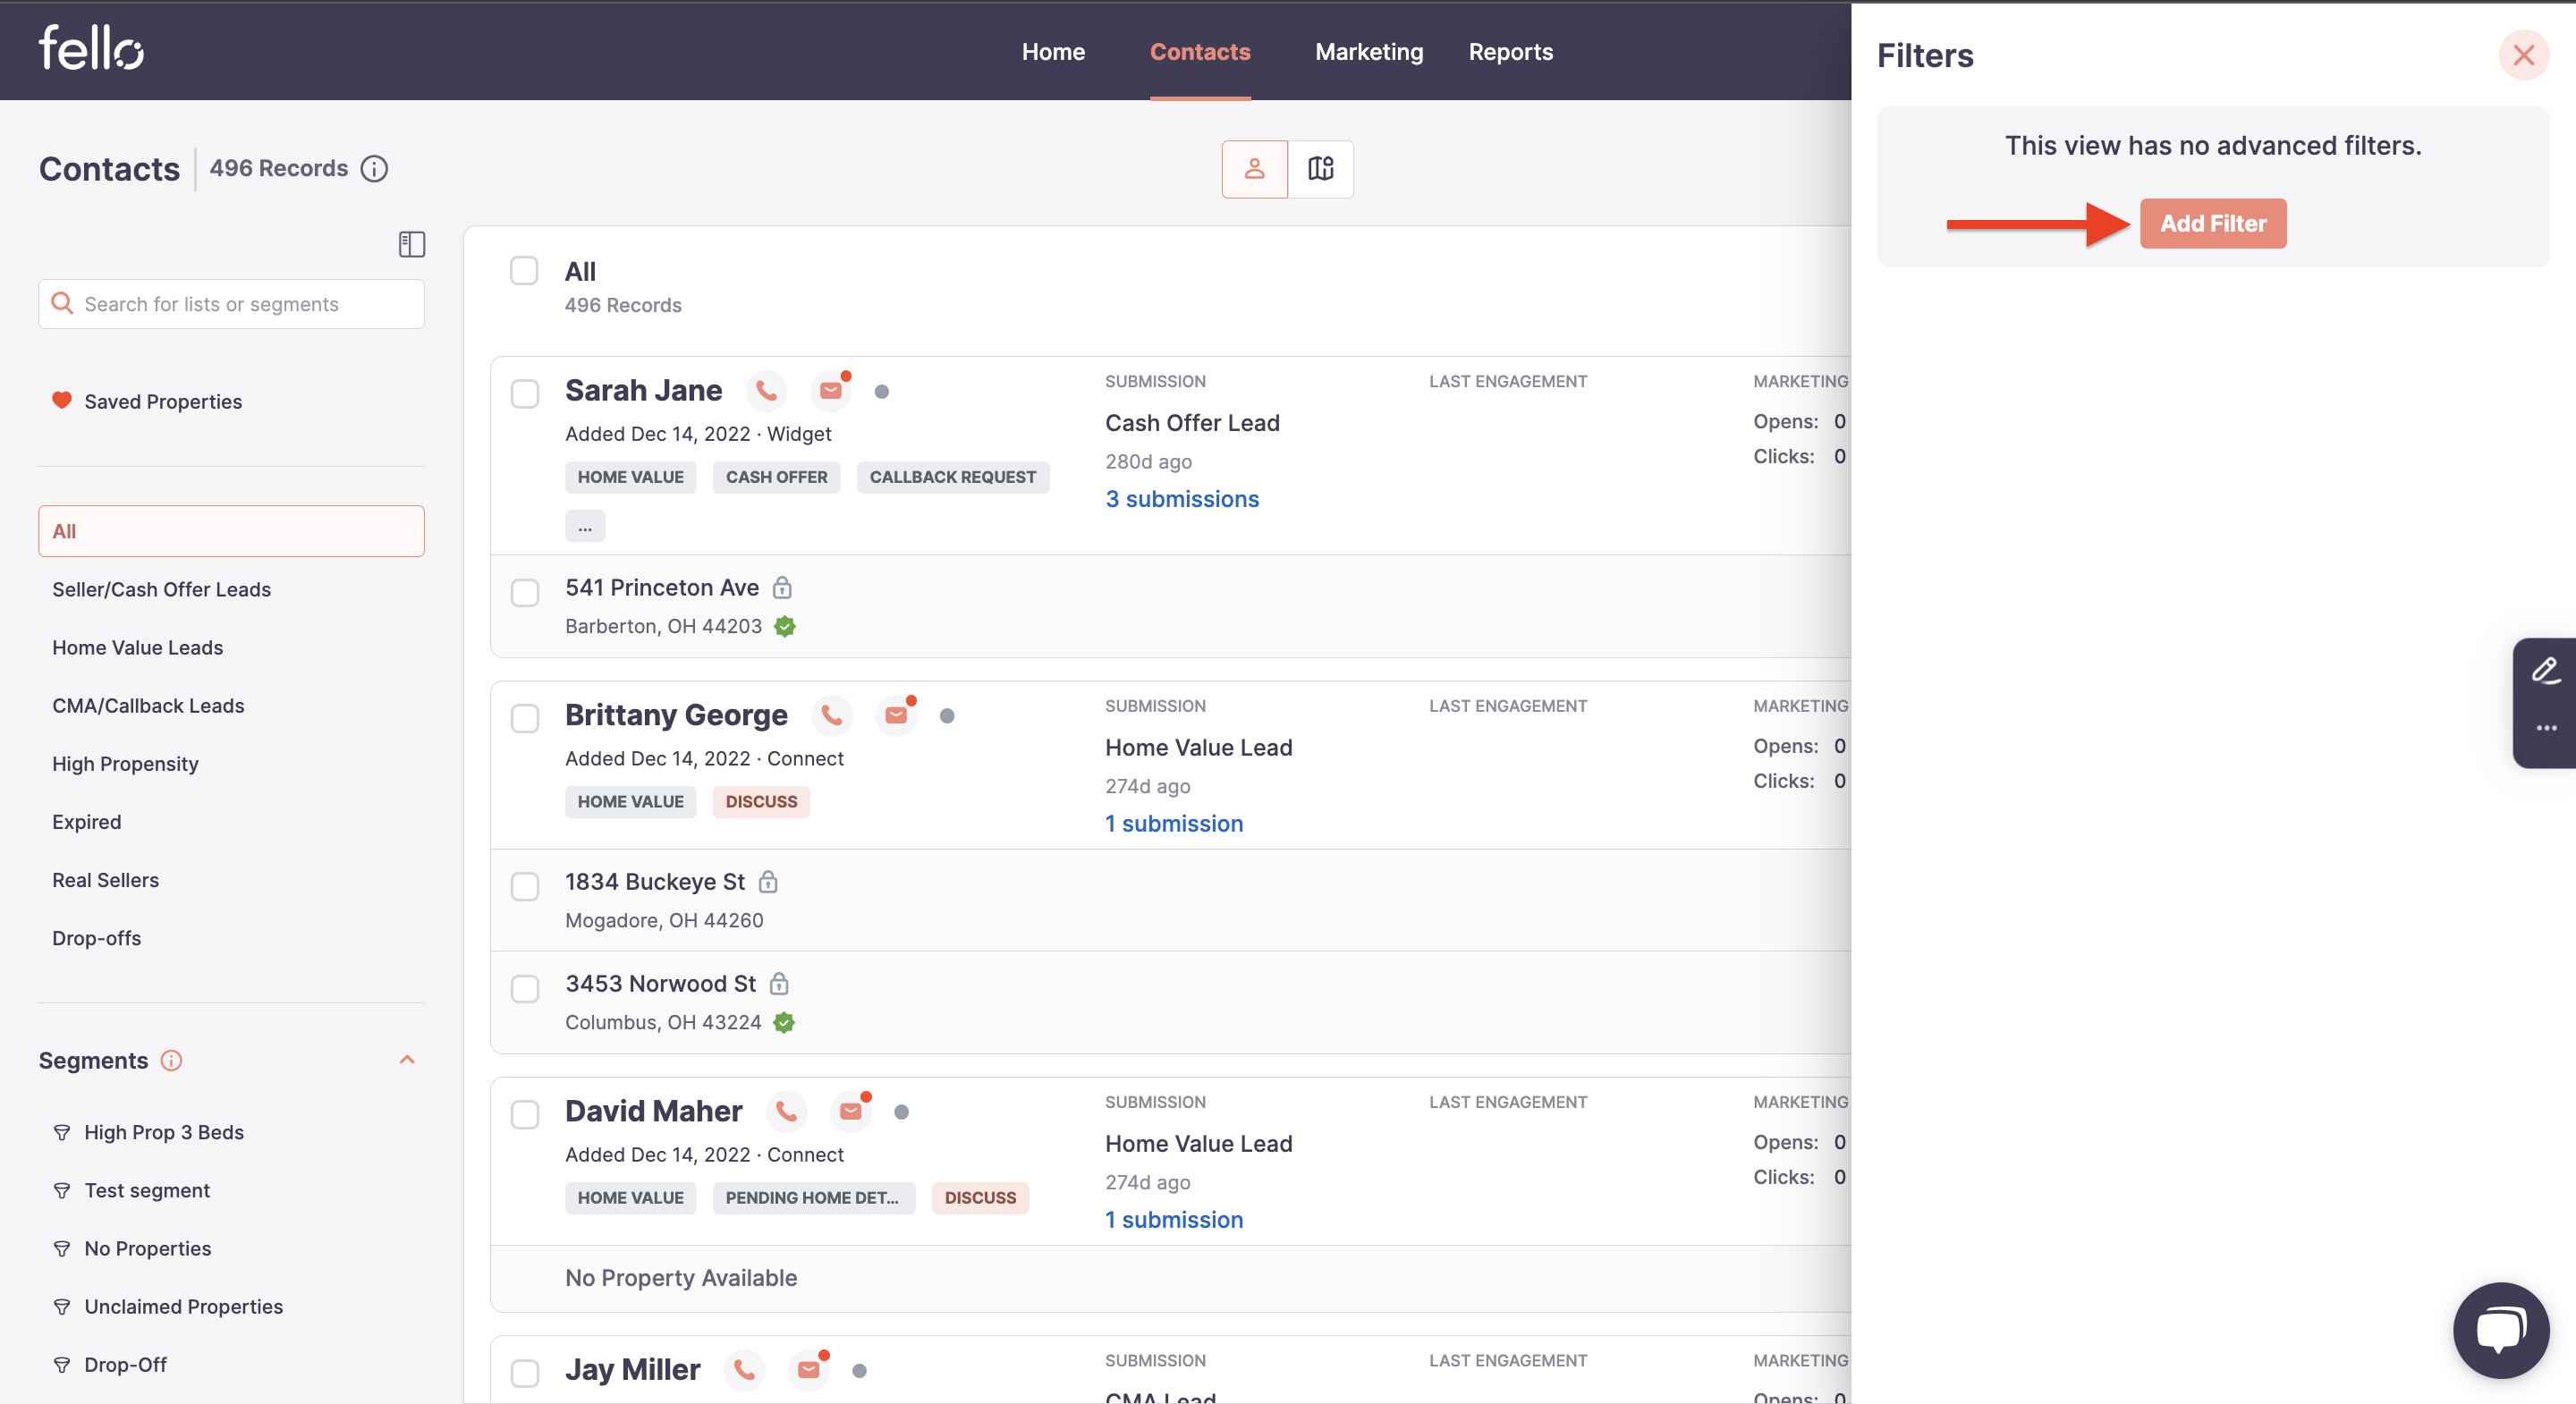
Applying Filters
- Once you click the Filters, you have to click 'Add Filter' to view all the different contact field options to apply the filters.
- First, the column on which filter condition has to be applied has to selected from a scrollable dropdown list.
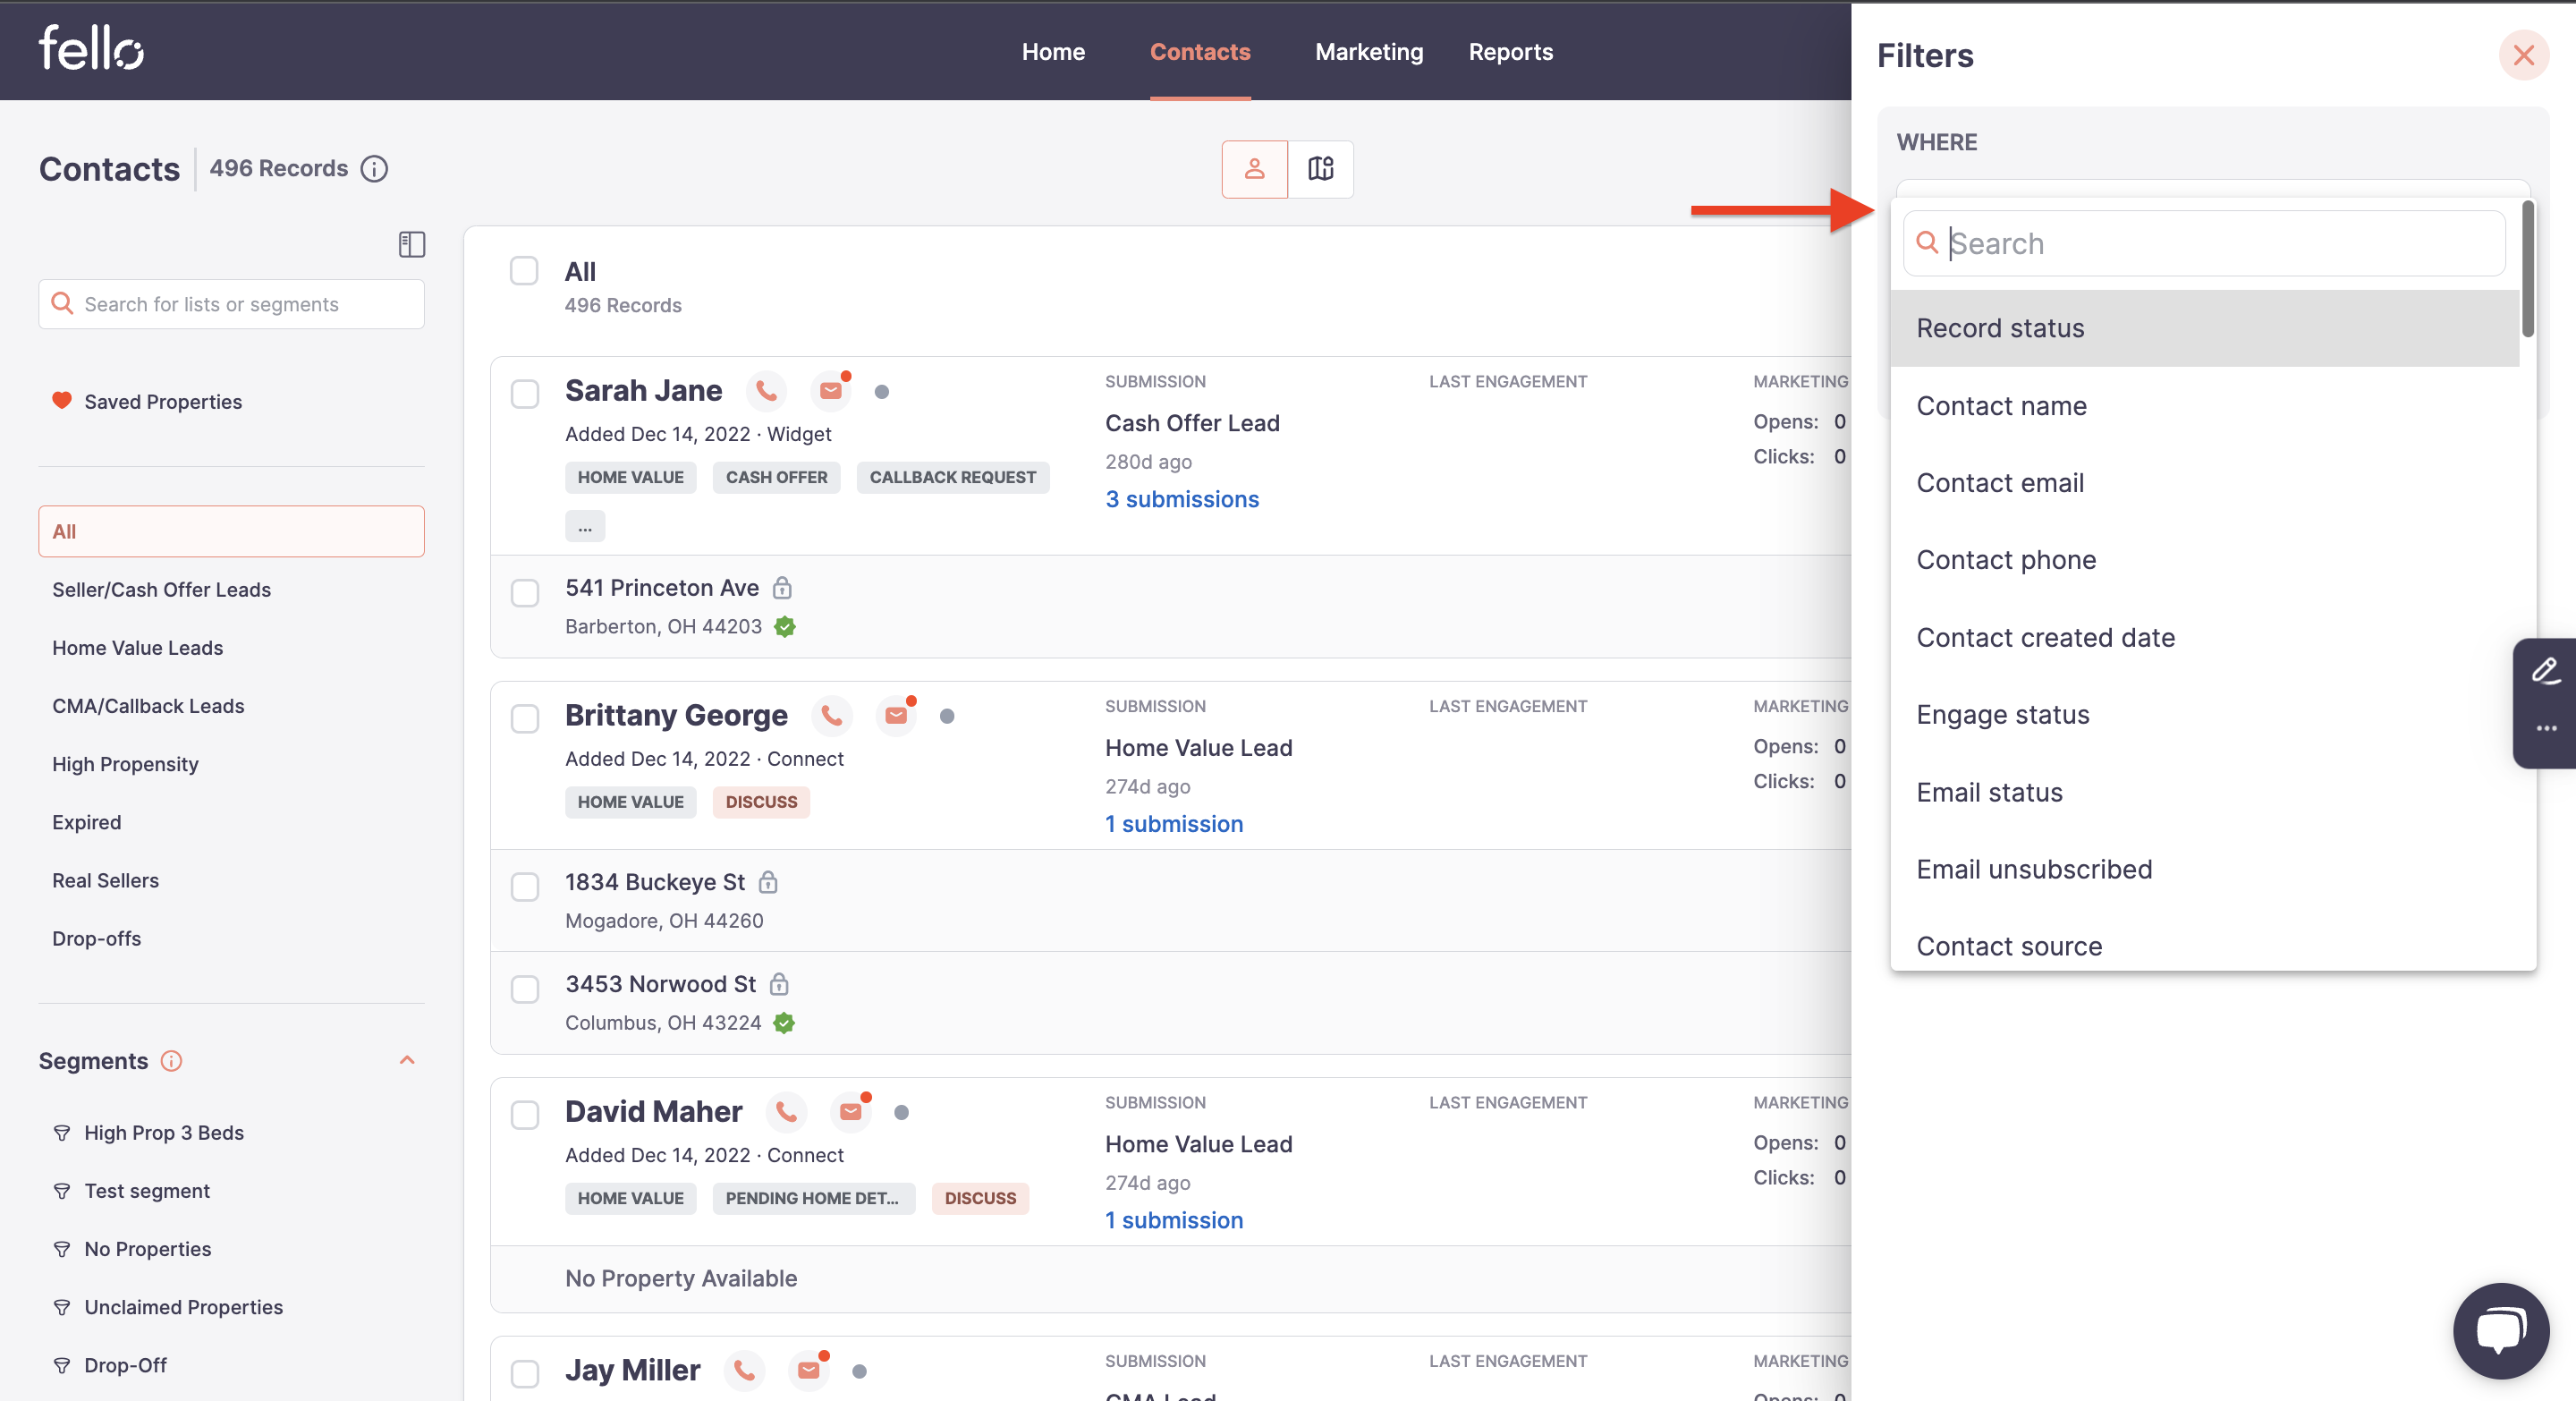
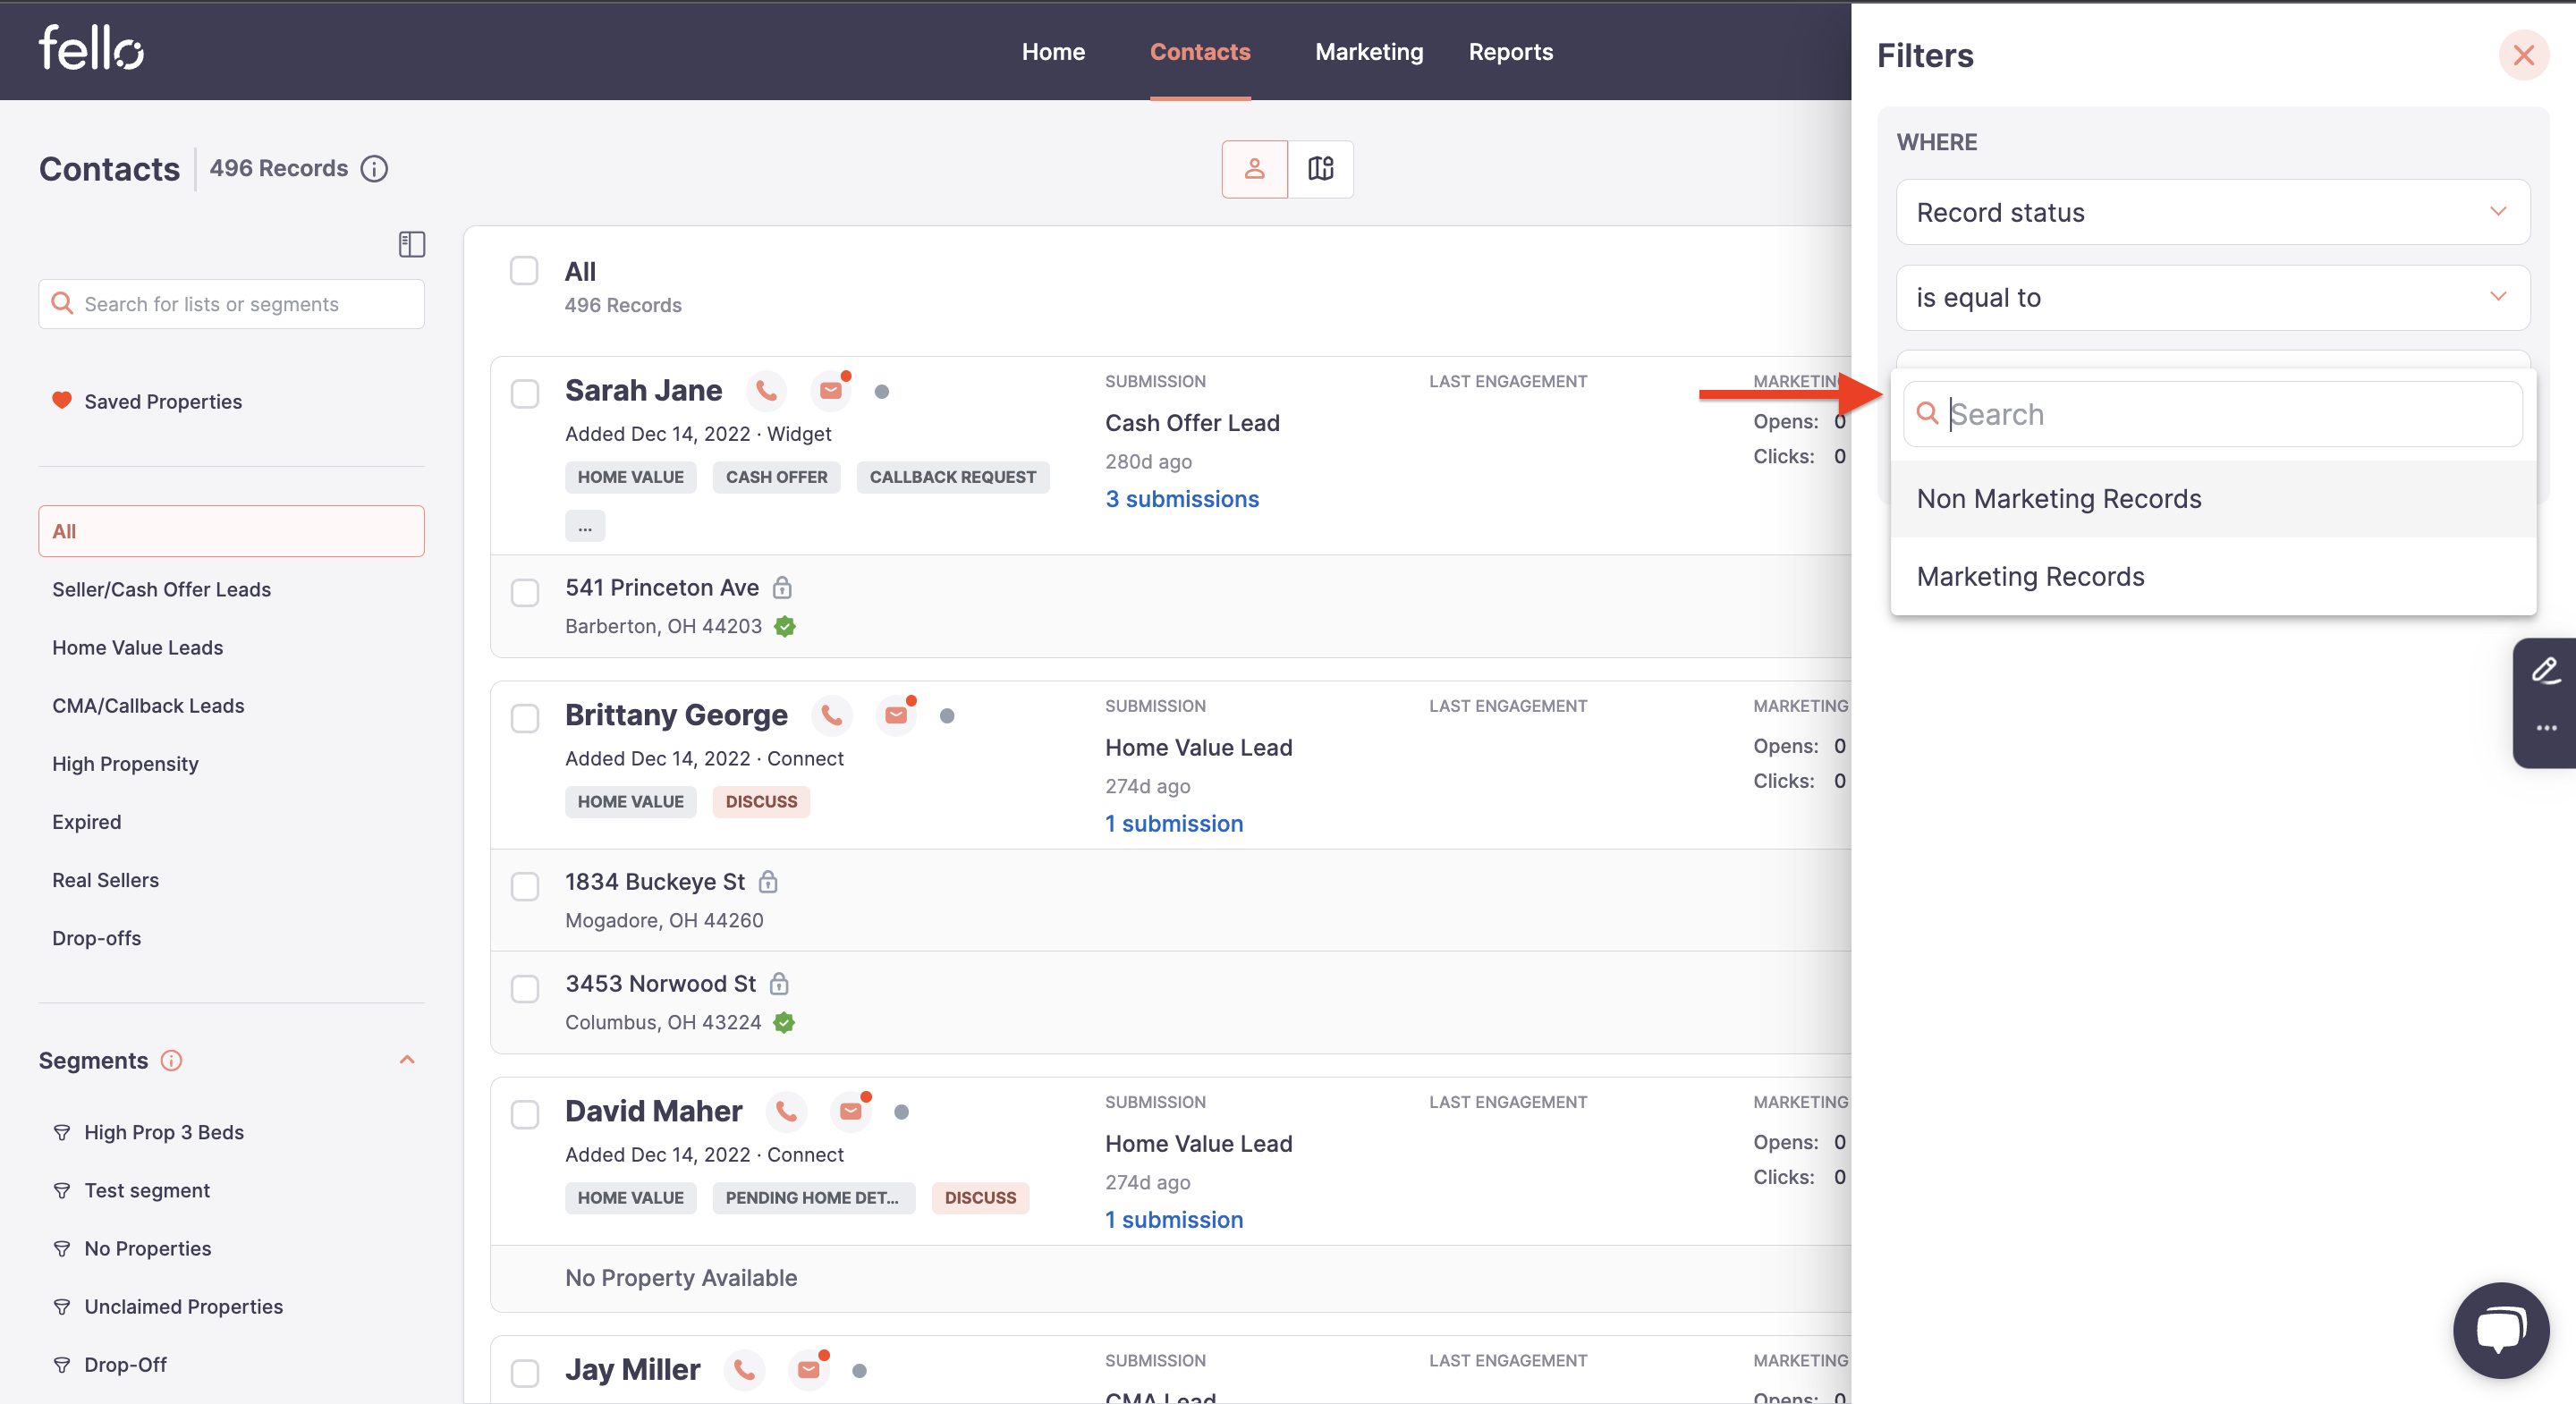
- Each filtering option will have a drop-down menu with various conditions you can select. Click on the drop-down menu and select your preferred condition.
- Once the condition is selected, you want to provide the filtering value.
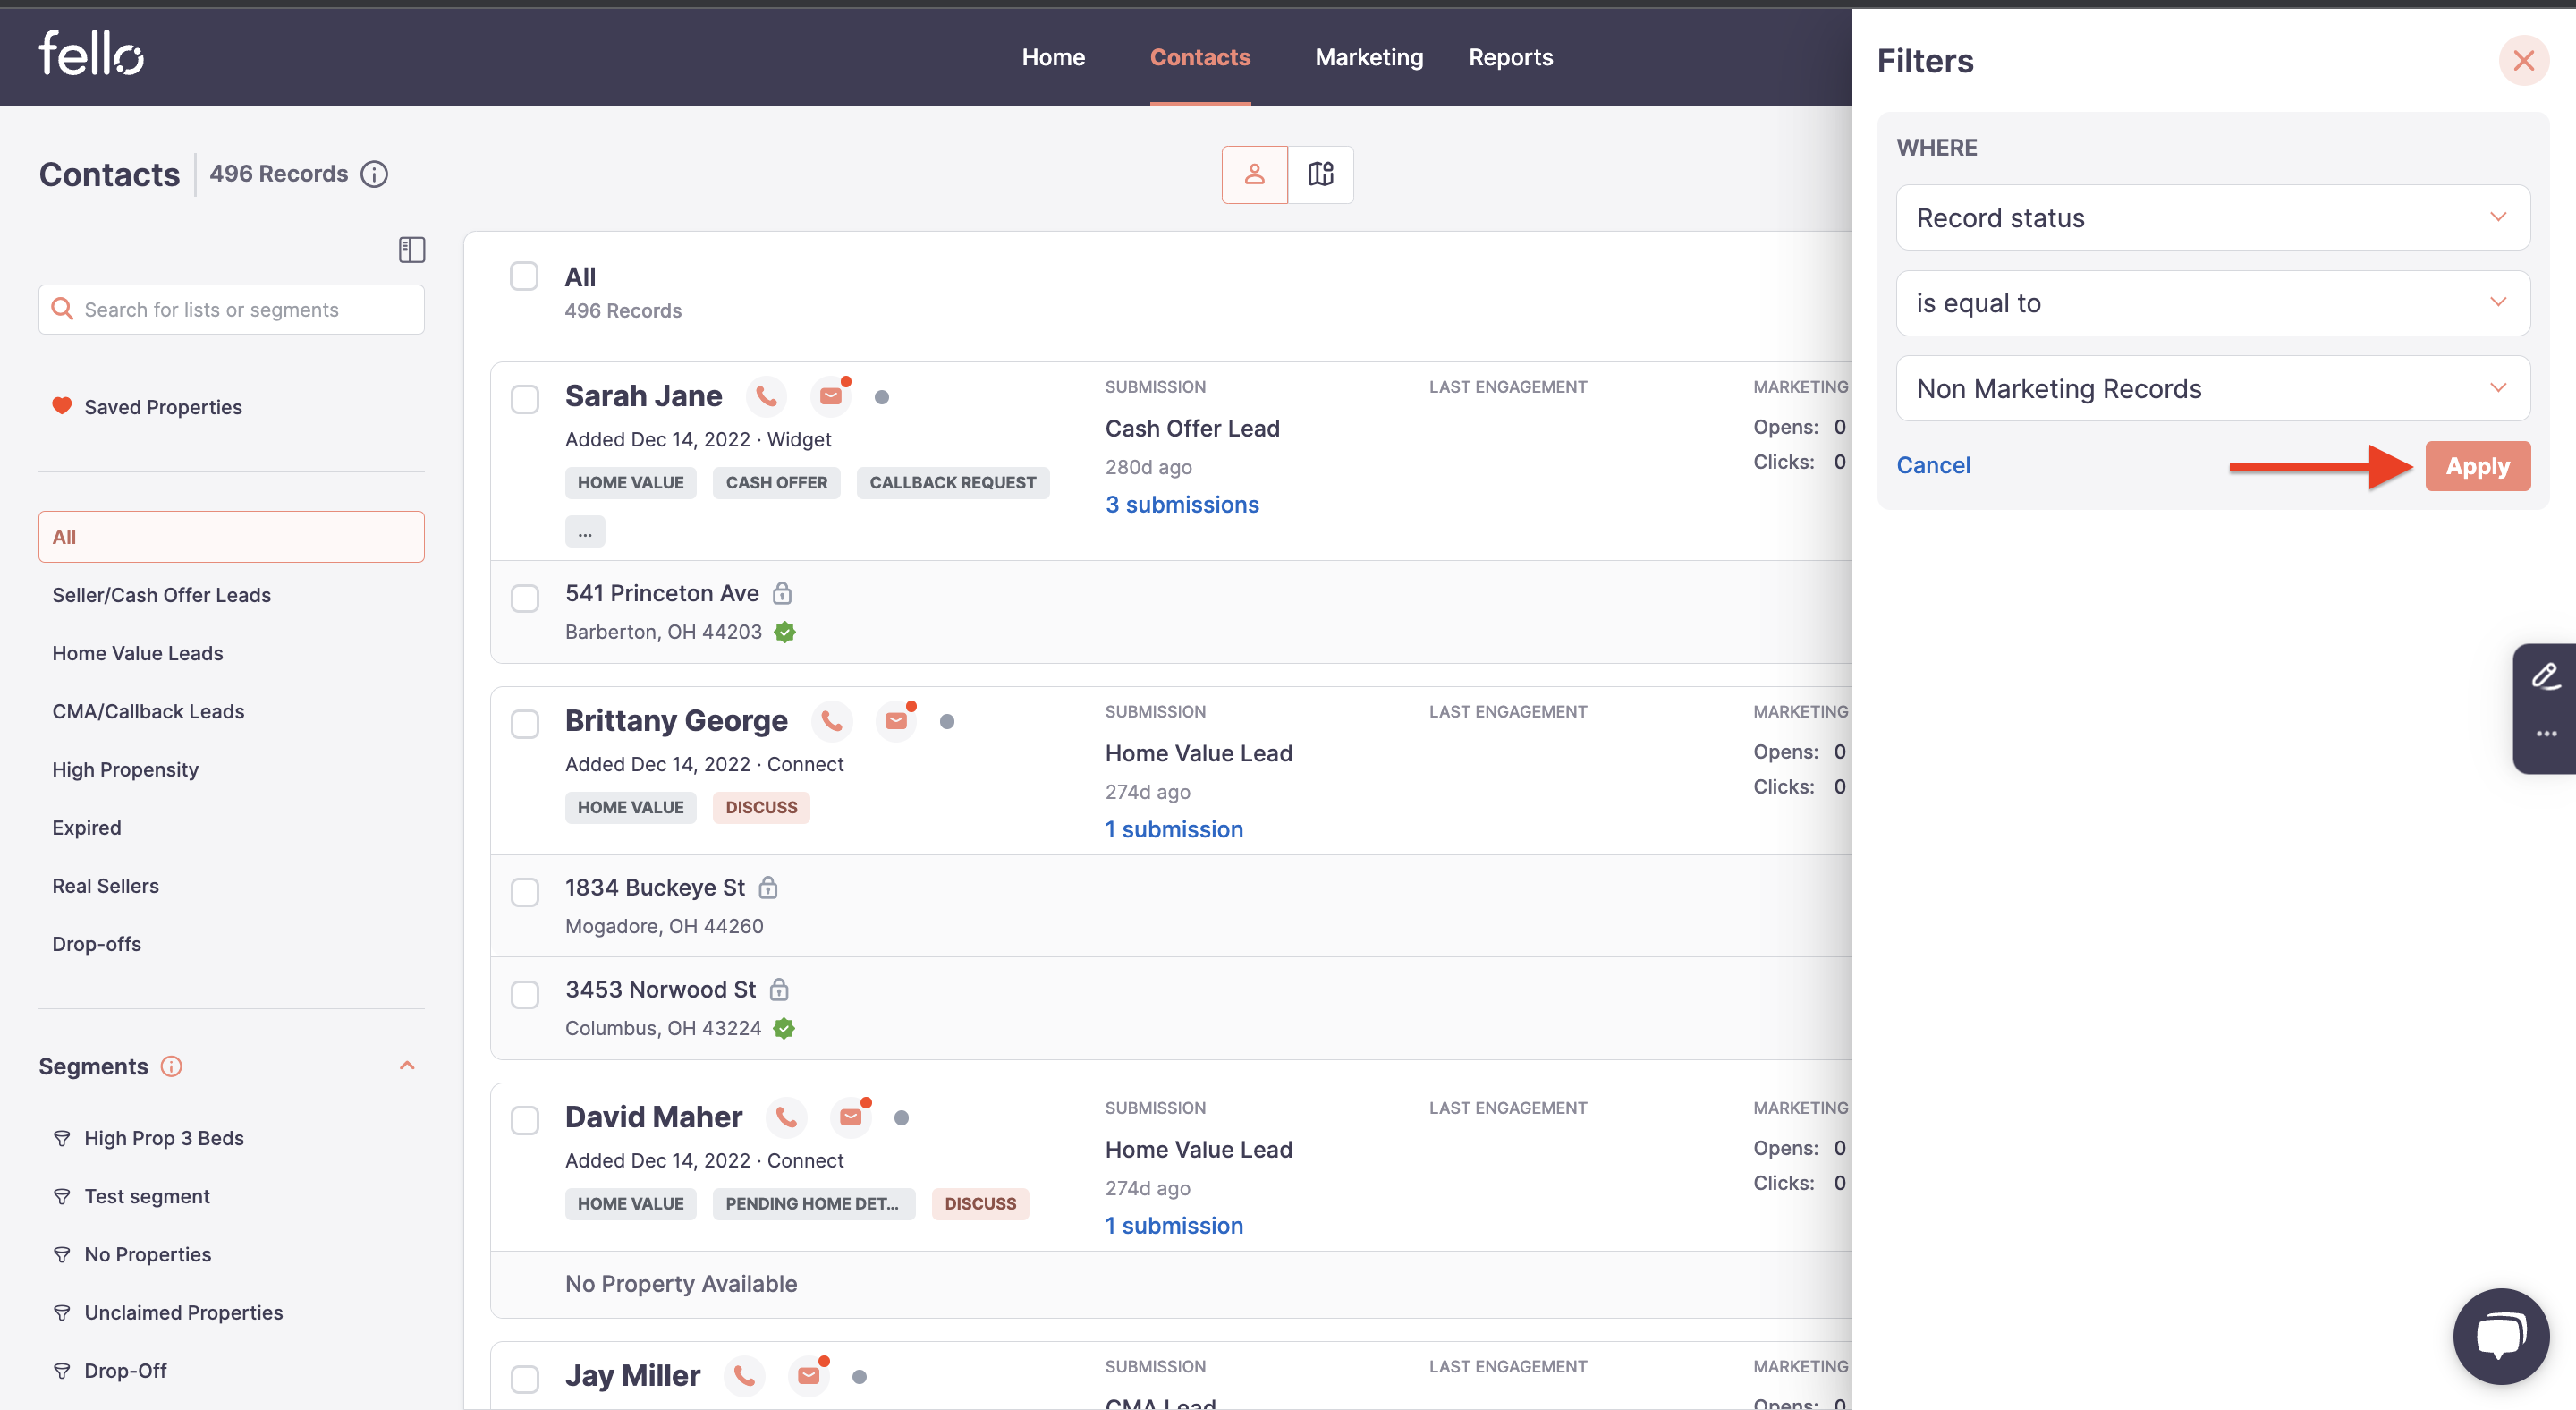
- Once you click 'Apply', the system will update your data view based on the selected filter. To clear the filter, click on 'Clear All' option in the filter dropdown menu.
Using Multiple Filters
You can also apply multiple filters simultaneously to narrow down your search results even further. Follow these steps to use multiple filters:
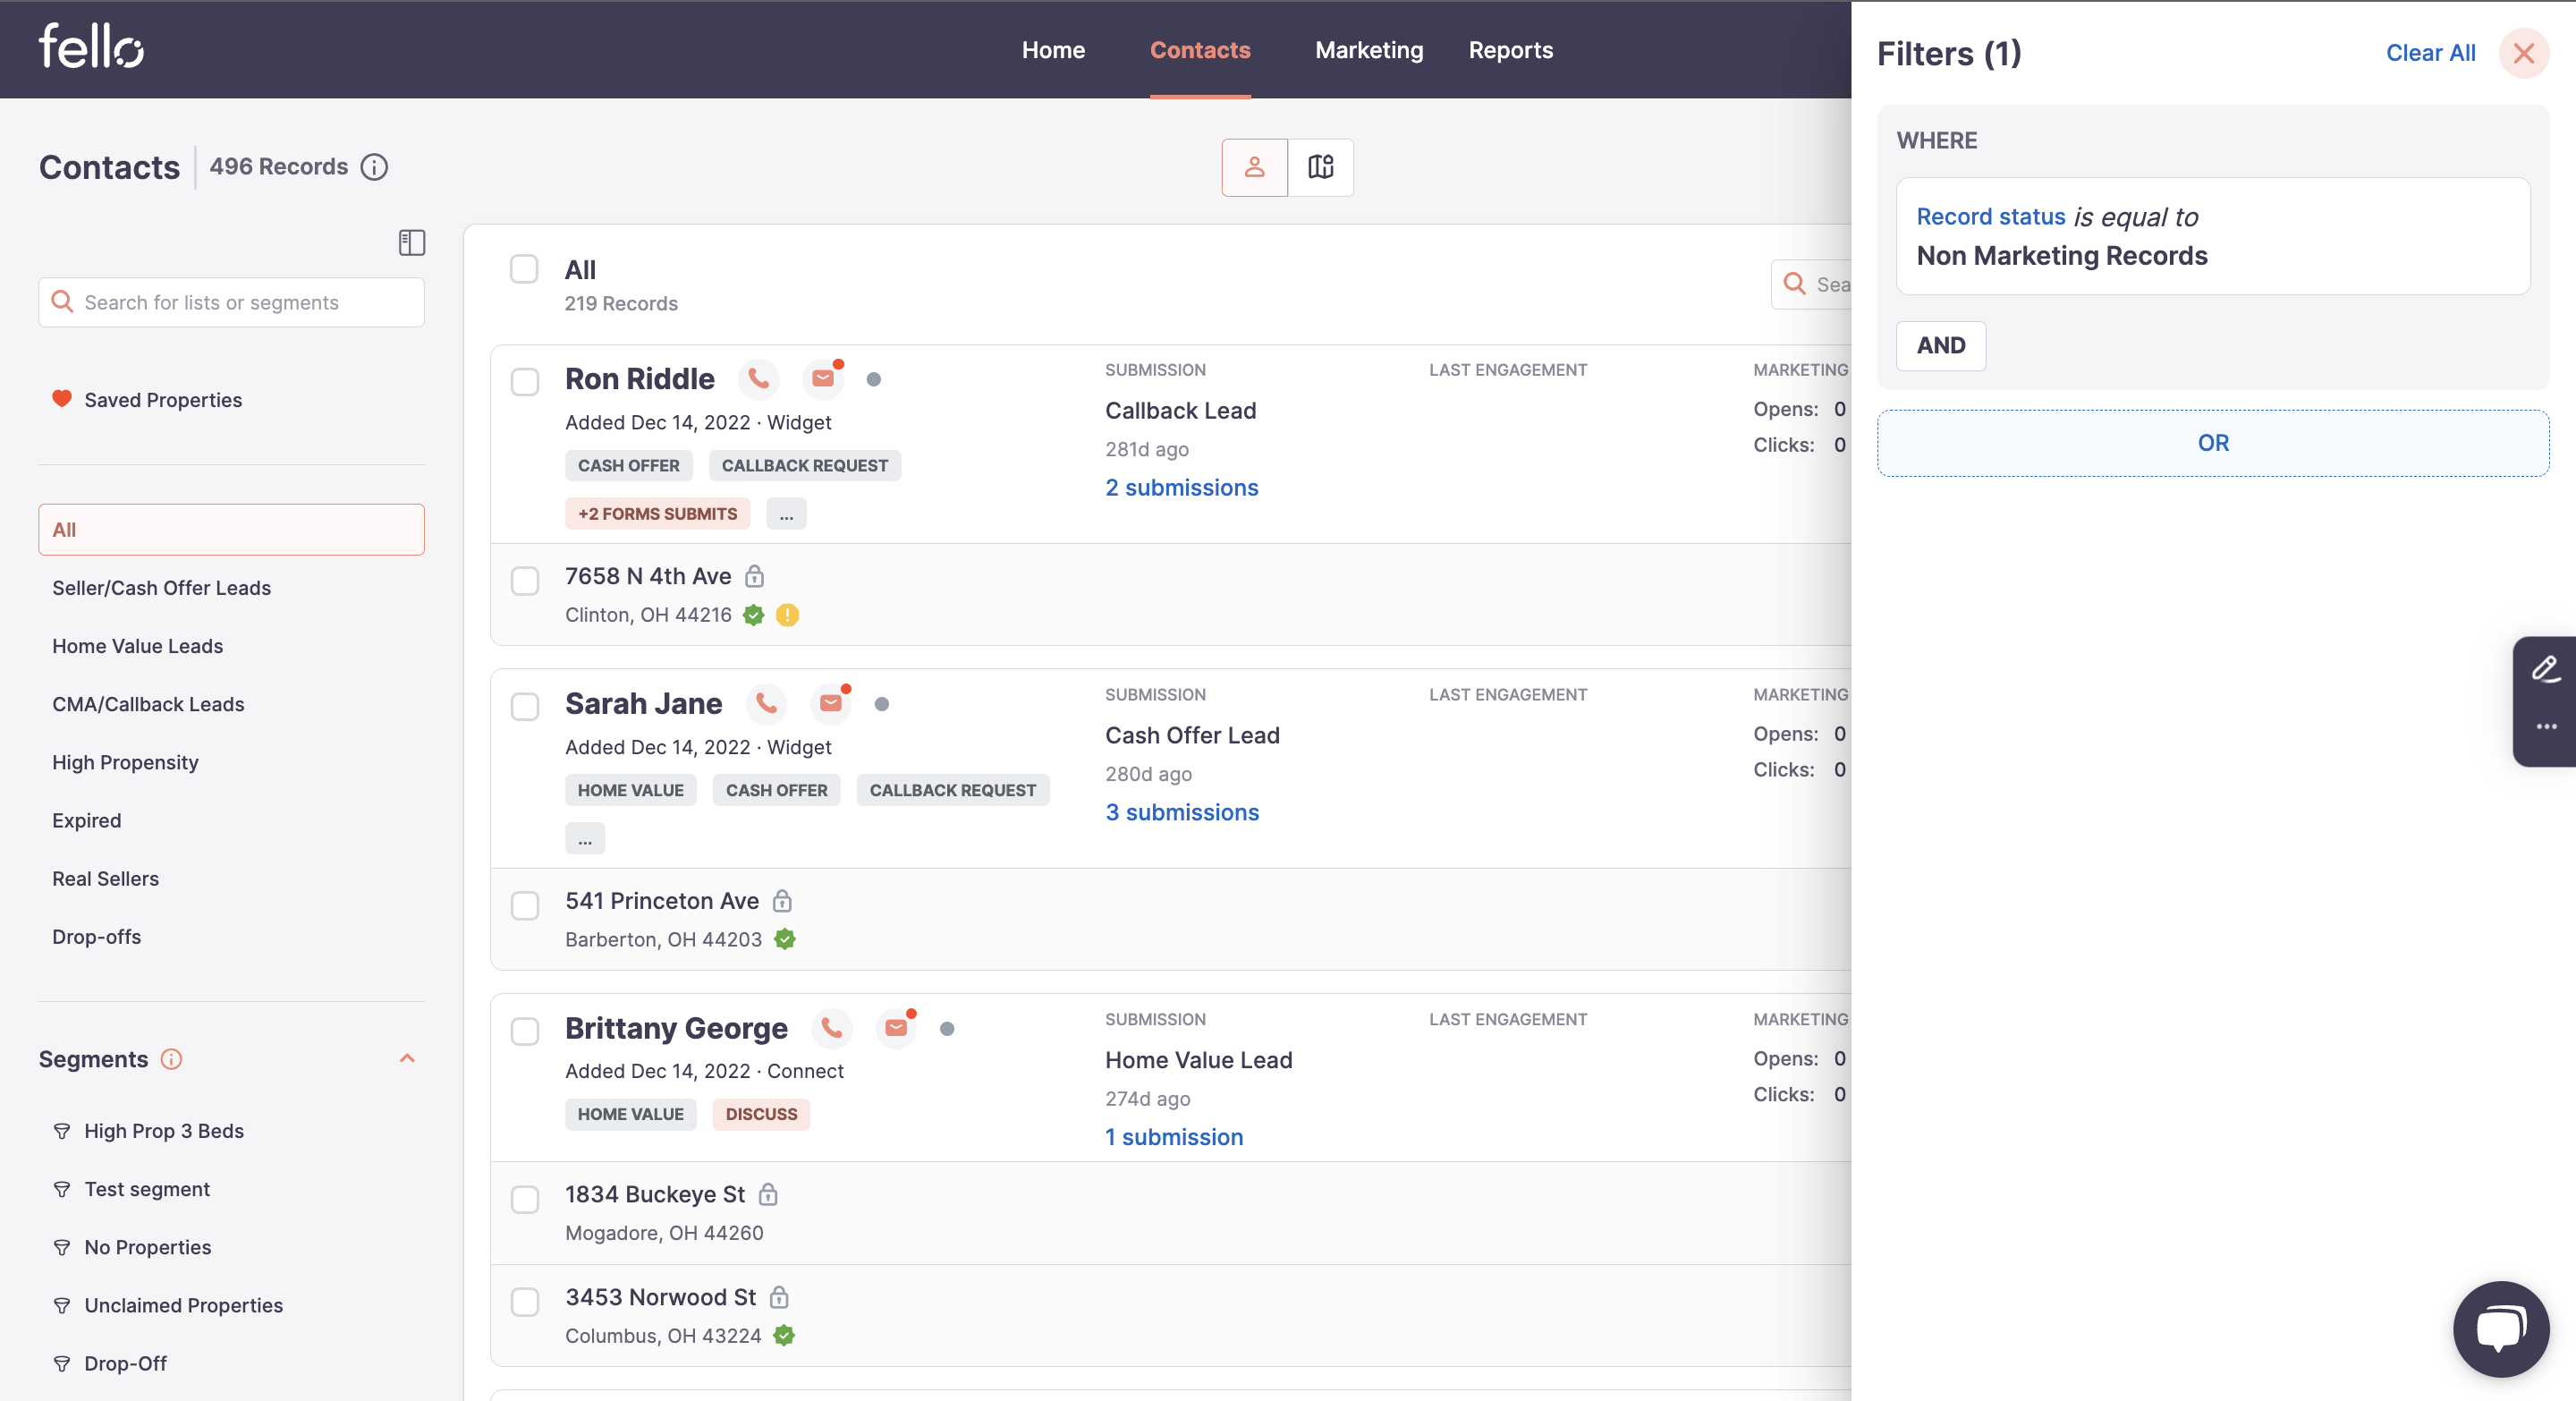
- Click on the filter icon.
- Select your first filter and input or select the value you want to filter by.
- Click on the 'And' 'Or' options to add additional filtering criteria to narrow down the filtered list. To identify objects that meet all criteria within a set of list filters , use AND logic. To identify objects that meet at least one criteria within a set of list filters, use OR logic.
- Repeat the process for each additional filter you want to apply.

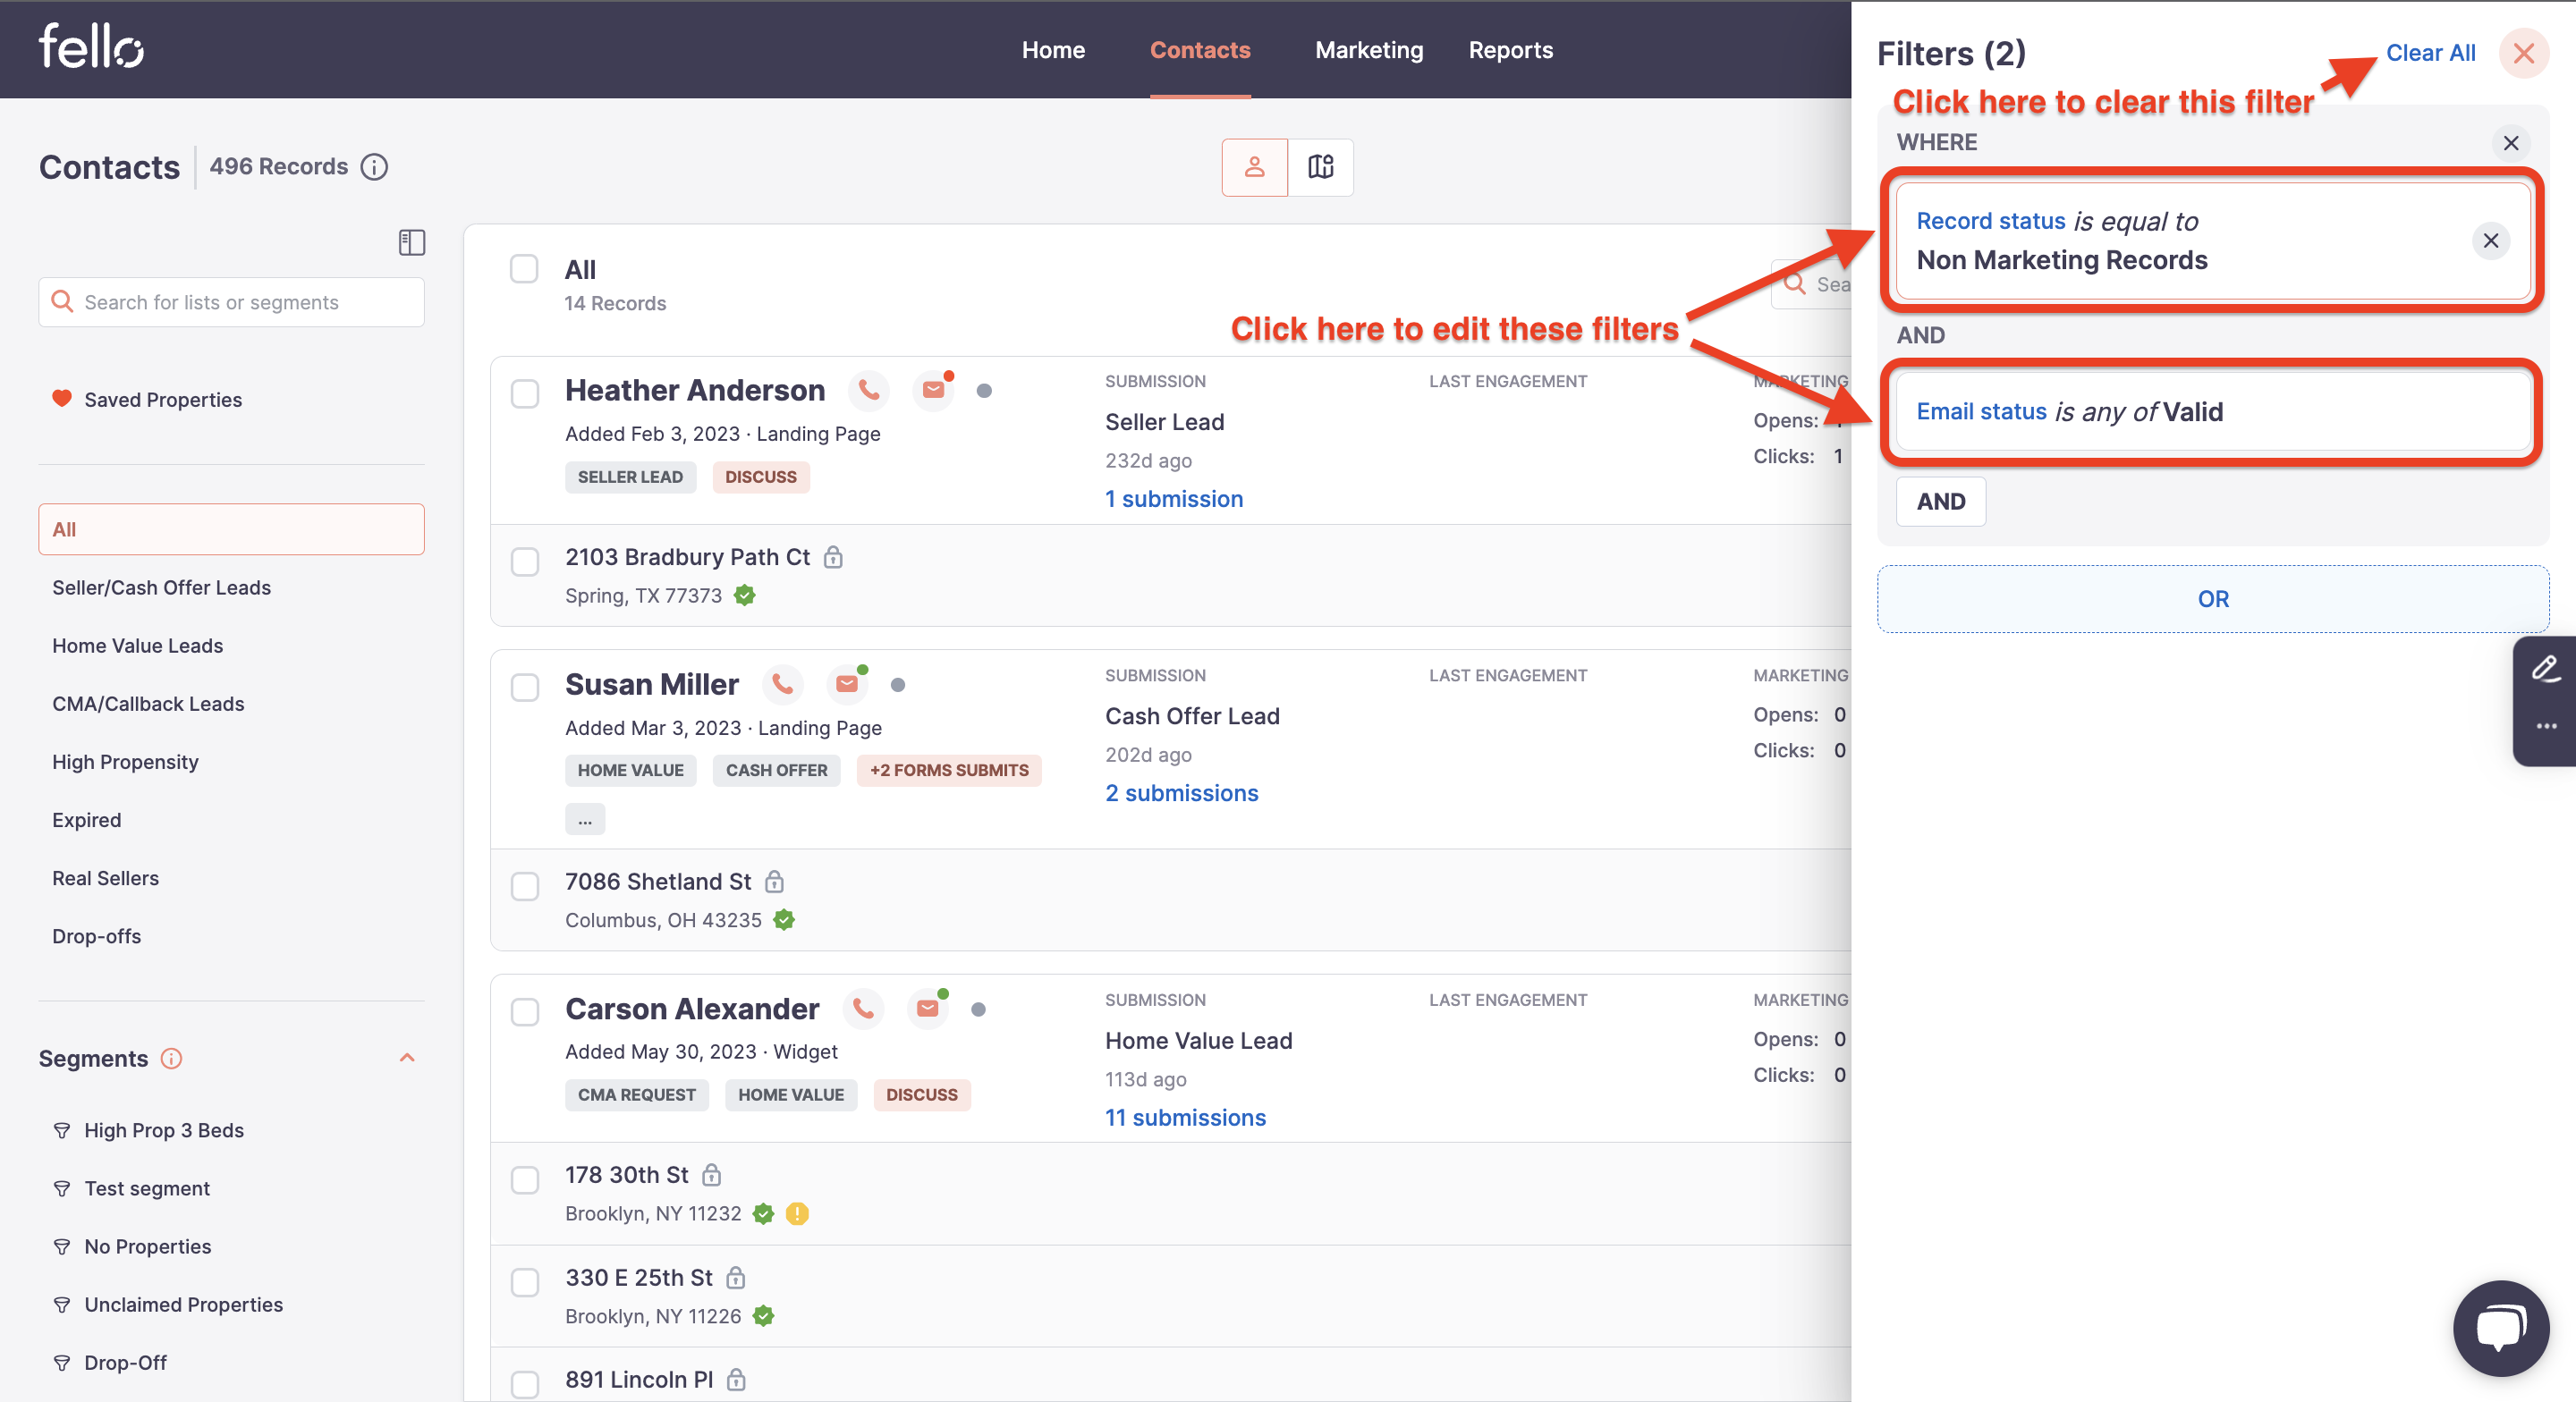
To remove one specific filter, click on the 'X' next to it. To remove all filters, click 'Clear All'.
Choosing Filter Criteria
Depending on the type of field you choose, there are a variety of options to set the criteria:
Contains: Enter a specific value. The records will only display if the property value contains the text you entered.
Doesn't contain: Enter a value. The records will only display if the property value doesn't contain the text you entered. Records that have no value for the property will also be displayed.
Is equal to: For properties, choose from pre-established options (like Marketing Records, Non-Marketing Records etc). The records will only display if the property value is equal to the value you selected.
Is after: For Date picker properties, select a date. Records with a property date value after the selected date will be displayed.
Is present: All records with a value for the property will be displayed.
Is not present: All records without a value for the property will be displayed.
Is any of: Select multiple values. Records with a property value matching any of these will be displayed.
Is none of: Select multiple values. Records with a property value that does not match any of the selected values will be displayed. Records with no value for the property will also be included.
Is less than: For Numerical properties, enter a number. Records with a property value less than this number will be displayed.
Is greater than: For Numerical properties, enter a number. Records with a property value higher than this number will be displayed.
Is equal to: For Numerical properties, enter a number. Records with a property value equal to this number will be displayed.
Is between: For Numerical properties, enter two numbers. Records with a property value that falls within this range(inclusive) will be displayed.
Is before: For Date picker properties, select a date. Records with a property date value before the selected date will be displayed.
Is after: For Date picker properties, select a date. Records with a property date value after the selected date will be displayed.
Is between: For Date picker properties, select two dates. Records with a property date value that falls within this range(inclusive) will be displayed.
By understanding how each filter criteria functions, you'll be better equipped to find the exact data you need.
Editing and Deleting Filters
You can easily edit or delete the applied filters.
- To edit a filter, simply click on the 'Filter' button next to the filter name.
- Make your changes and then click 'Apply'.
- To delete a filter, click on the 'Clear All' button in the header beside Filters.
Conclusion
The filtering system in Fello is a versatile and efficient tool, designed to improve your navigation experience. It lets you refine your data view by as many parameters as you need, helping you to manage your tasks more effectively.